Thursday, January 27, 2011

Ken Baily Inspired Painting

A few years ago, while on vacation in Santa Fe, I discovered this little housewares store called Mindy & Clyde Cupboard Company.

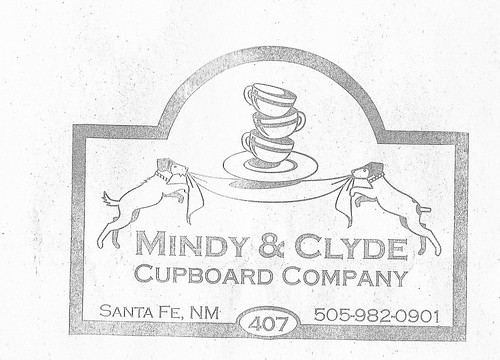
Their signage had me at hello.  How darling is that logo? The inside of this store is just as charming. Vintage dishes, tablecloths, and housewares galore. The owner was super friendly and we chatted about dogs and dishes. Anyway, I bought a planter just to get the bag! Then I proceeded to save the bag for the next 3 years. I always knew that I was going to "make something" out of it.


And, I finally did.

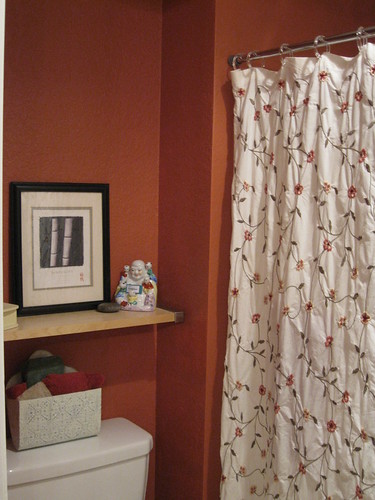
With the high ceilings and vast white in this apartment I knew I wanted something big and graphic for our one blank wall. I thought of a  Ken Baily painting. They combine my love of advertising and dogs. That's when I remembered my Mindy & Clyde bag and I decided to make my own painting. First off,  it's custom for our colors and the size of our space. Secondly this painting reminds me of  our trip to Santa Fe. It was our best vacation to date.

So that is the sweet story behind our new "art" and now here are the behind the scenes details.

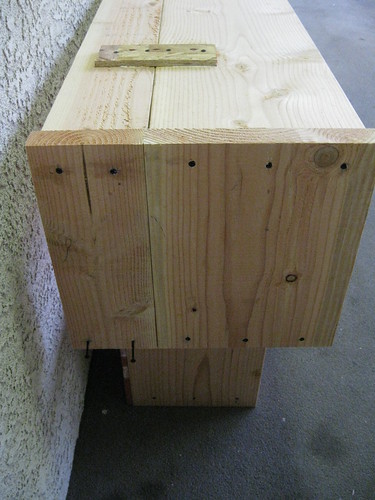
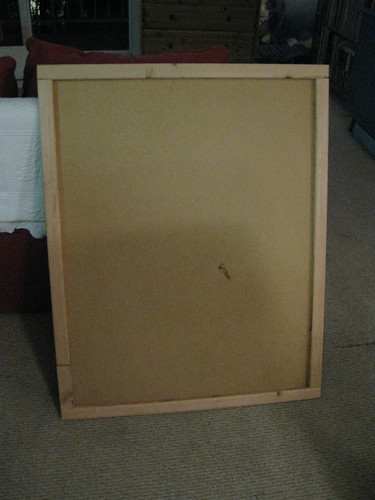
This jumbo sized painting started it's life as the backing of an IKEA Billy bookcase. After the move, I relegated that bookcase to our pantry closet. The backing was falling off, so I removed it and bolted the bookcase straight to the wall.

Not one to waste, I saved the 30" X 38"board specifically for an art piece for the dining area wall.

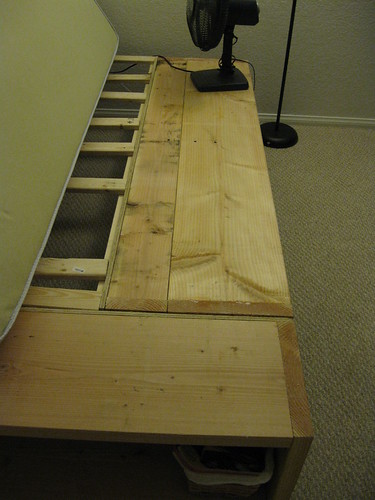
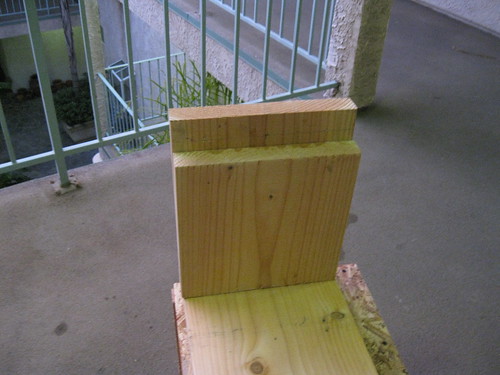
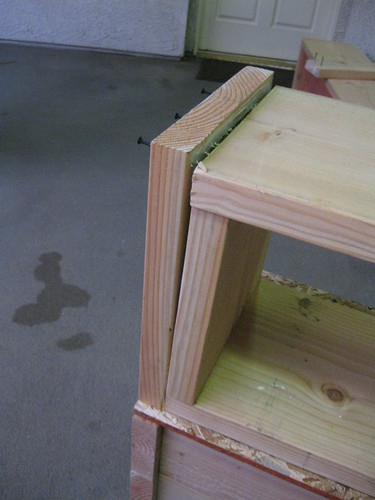
To give it the thickness of a real artist canvas I cut and nailed thin pine furring strips to the back.
Faux Canvas Back

Then I covered the whole thing with Modge Podge and manila paper from school. This gave it a bit of texture and covered the furring strips.

Second Coat
I  painted a layer of red spray paint, a layer of  brown left over kitchen paint, a layer of white spray primer
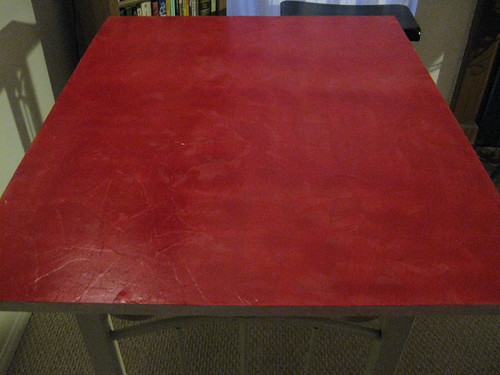
and finally a layer of Rust-oleum "Moss" spray paint.  I sanded the whole thing down to give it a worn look.
 You can see the texture and worn finish here.
To size the image I scanned the bag and turned the picture into a "pencil drawing" on Picnik.
Logo
Under the "properties" tab in the print menu there is a "page layout" tab. In that tab there is a multipage printing section which includes "poster printing." I used that function to print the picture to size. Then I taped all the pictures together.


I cut out the frame and colored heavily with a pencil on the back of the design. I traced over the entire design to transfer it to the "canvas." Next, I painted the design with acrylic paint. This had to be done in daylight as the lines were very faint and hard to see. During this stage, I was really wishing I had a Silhouette machine! (Although, now that it's done, I don't mind the uneven hand painted quality.)

When the painting was done, I sanded it down to distress it further.
These are all night time photos. I will update with some daylight pictures soon.

At just about $6 for the furring strips and spray paint, this project definitely qualifies for "Frugal Friday" at the Shabby Nest! I am off to check it out now! Have a great day!


Here is another party I am going to join. With this one I hope to win some really adorable baby shoes for one of my nieces to be. Also, amazing ideas! I've spent an hour browsing and added half a dozen projects to my to do list!
Visit thecsiproject.com

Love the CSI Project! Lots of great ideas there!

Tuesday, January 25, 2011

Tall Cloche for Valentines

This weeks CSI theme is Valentines Day. I can not yet share my Heart to Heart Valentines Swap goodies and up until tonight I hadn't decorated for Valentines.
Valentine Cloche

 (Man! It's hard to light pictures at night.) Always one to join in on a creative challenge, I decided to combine some household elements to make a tall cloche.
IMG_3217 
This pile includes my juice glass mini cloche, a coaster, a candle stick, moss, ribbon, and my grandparent's house key. That luscious two toned ribbon was my favorite part of a bath soap gift. Beautiful ribbon, you are a gift that keeps on giving. The juice glass cloche is just an upside down juice glass with a wooden knob glued on top. I set it on a coaster or a saucer. Voila! A cloche.
IMG_3221
The heart is an eraser. It was probably was confiscated some Valentines gone by. If classroom tools become toys, I take them. Then they become decor. LOL!

Everything is just layered together. Some Quake Hold keeps the coaster and the candlestick secured temporarily. I don't want to make permanent decorations for Valentines. I simply do not want to have to store more single use stuff.

The Complete Works of Shakespeare is symbolic of love. It gives height and a dash of red to this grouping. Along side it are a wedding picture, a bowl of heart shaped rocks and a small apothecary jar with Mardi Gras beads.

I love this elevated cloche so much I am scheming about other vases and candlesticks that might be temporarily commissioned.

So what are you up to this week?

Visit thecsiproject.com

Sunday, January 23, 2011

More Bits And Bobs Crafting

Finished Photo Holder

I made another photo holder. This time it's for me! I have been having a great time crafting for my own home the last few months. It has been a long time since I needed anything. So gift and swap crafting was my mainstay.

Wood Photo Holder

Anyway, there is nothing too remarkable about this project. It's a scrap of wood, a metal plate from HD, a wooden base, knob and two wooden spools. I used some antiquing medium mixed with leftover kitchen paint to get just the right brown for the glaze.
Knob magnet
The magnet is kinda cute. It was a tiny knob from some dresser drawer many play kitchens ago. I jammed it into a mini bobbin sized spool and glued a magnet onto the back.

 Happy Monday!

Monday, January 17, 2011

Ana White Full Sized Storage Bed with Out of the (Crayon) Box Modifications

 Full Sized Storage Bed with Modifications
This weekend my dad and I built the full sized storage bed from Ana White's Blog. I really love the deep cubbyholes of the twin sized storage daybed and was disappointed with the smaller (12"X12") cubbyholes on the full sized storage bed. So with the help of my dad we came up with a plan to modify Ana's plan to suit my desire for bigger cubbyholes. We also figured out a way to save a few dollars and a whole lot of time! 

knockoffwood-full-storage-bed-3
 We Used Thicker Wood
OK, this is the Ana's original drawing. It calls for 1X12 boards which are then trimmed out with 1X2's. We found that the 1X2X8 boards were quite a bit cheaper and the thicker boards actually didn't require trim. At my Orange store the 1"X12"X8' boards were $14.95. However, the 2"X12"x 8' boards were only $8.43. That was our first change and it would have been a $39 savings! I say, "would have been" because 2" X 12" boards are very heavy and while loading them on to our cart, we neglected to notice we chose 2"X12"X10' boards which were actually $10.54. So our savings on the boards was actually about $26. We ended up with quite a bit of extra wood. No worries there, I will use it!
IMG_3188

As soon as we started building the boxes, we realized that with the thicker wood, there really is no need to add the 1"X2" trim. It is not needed for stability and it's really not needed for looks either. That right there had me jumping for joy! I was dreading all the miter saw cutting that the trim would have required. This also saved me about $7 in trim.

Another savings move was the decision to use OSB instead of plywood for the backs of the cubbyholes. Once everything is painted, nobody will be the wiser. The cheapest grade of plywood was $13. OSB cost about $8. Only $5 difference, but hey, every penny counts.


We Made The Side Cubbyholes Deeper
knockoffwood-full-storage-bed- Edit
This is my clumsy illustration of our changes. Basically those black stripes are 2"X6" boards. We actually made 2"X6" boxes and attached them to the bigger 2"X12" boxes to create finished cubbyholes with a depth of 17".
IMG_3174
We used some OSB scraps to attach them on the bottom.
IMG_3181

We used some 1"X 1" square dowel to attach the two "boxes" on top.

IMG_3175
This shows the side cabinet stacked on top of the end cabinet. You can see the "2X6" and 2"X12" parts joined together. It is super strong and frankly, this whole addition is hidden inside the bed and under the mattress.
IMG_3185
*Quick tip- My wood was damp. It was so slight that I didn't really notice it, but then when I laid my mattress down, it got damp. So we had a fan in there to dry it for a bit.
IMG_3188
That's deep!

Divider Modifications
Another modification is pictured above. We placed the center divider half way in so that both the 2"X6" and the 2"X12" could be screwed into the support. I could have used a 2"X6" piece behind the 2"X 12" divider to make it flush to the front, but I didn't mind that it was set back or that there was a little space open behind the divider. Frankly it was getting late and I wanted the job done. We actually left the divider out of the end cubbyhole altogether. With the thicker boards we felt it was plenty strong enough to go without the divider.

Helpful Trick
IMG_3176
The bottom of the boxes is elevated 3/4" off the ground. So my dad and I built the top and two sides first. With it sitting bottoms up on the bench, we used the cubby dividers tp perfectly support and position that bottom board as we screwed it in.
IMG_3177
That is just the kind of trick someone with experience can teach you! Thanks Dad!

Finishing Plans
IMG_3186
I plan to sand and paint this bad boy over spring break, or maybe even summer vacation. It's going to be a lot of work and right now I need to concentrate on school. In the mean time, my father suggested using Gorilla tape over the rough spots to protect the mattress bottom from tears. I also covered a lot of the screws that are on top. Better safe than sorry.
IMG_3187

Another detail that I want to take care of is the side of the bottom cubby. You can see where the OSB is. I am thinking about getting some thin trim about the depth of a paint stirrer and framing out that one side.
IMG_3183
Too bad this picture is staged. My dad is actually on a red eye back to Florida right now. The bed was finished just before they left.

Final Analysis:
Pros
- Easy to follow -easy to modify pattern from Ana White
-Using the 2" thick boards made for a very sturdy bed & saved some time and money on trim
-Modifying the side cubbyholes to make them deeper really adds even more functionality to the bed
-Very fun bonding time with my dad.
-Lots of DIY satisfaction

Cons
2" boards are super heavy. This is a two person job. Even shopping was a two person job.
Because of our changes and price comparing etc...shopping at Orange for our supplies took a long time.
We should have deducted 2" off the width of the bed. Not a big deal really, but in an apartment every inch counts.
2" boards and OSB will require more sanding and prep work before painting.

After I make some returns of finishing nails, extra boards, and a miter saw I never used, the cost (before paint) is $121.64.

Oh! And CA residents, I used a coupon for OSH and they honored it! So I saved about $30 after three trips through the checkout.

I definitely caught the building bug! Sadly, I have a ton of furniture and don't need anything else right now.

Do you have any building plans right now? Do share!

Saturday, January 15, 2011

Building With My Dad

My parents are in town! Cliff took my mom to an Indian lunch and the Indian art exhibit at LACMA. I am building Ana White's Full Size Storage Bed with my dad!
Pretty much a perfect day.

Wednesday, January 12, 2011

Shower Gifts & My Chinooky Bathroom

It has been fun to find new places for my things in the new place.
 Shower Curtain Pattern
This is my shower curtain. It was a shower gift and I still really love it. In fact, I still really love most of the things I registered for seven years ago and very little is changing in our new place. My mom used gifts from her shower/ wedding for years and years. I remember registering and thinking, "I need to like these things for a long time." Just a little pressure.  So anyway, I am really grateful that I do still like my choices.

And now, for the first time, I get to paint!
Dutch Boy "Chinooky" Paint Sample

Here are my towels and a few paint samples from the Dutch Boy line at OSH. Although I love the green, I tend to favor warm colors. My towels are an almost perfect match with the "Velvety" color on the right. However, I decided to be less matchy and go with the dark salmon colored "Chinooky" in the middle. It is a bit more orange than the color in the shower curtain, but it is close. I have so much red all through the apartment, I wanted to do something related, but just a touch different.
Dutch Boy "Chinooky" Bathroom
This is a really moody color. It changes a lot with the light. Here it looks more orange/brown. Also, I ran out of paint before I did a second coat. It really needs a second coat, but that will have to wait until summer at this point. It is good enough for now.
Bathroom Curtain
The curtain was hacked by hot gluing/Gorilla taping three napkins to a scrap board. A while back, I got the wood at HD in their scrap section for $1. It just so happened to be about 2" longer than the window. Also, the board adds just enough length to the napkins. This was truly made up as I went along. (My favorite way of doing things.)
Bathroom Curtain
These napkins were never really used because they require *so much* ironing. I figure they will be steamed daily in here.


Before and After
IMG_3157

As I am the curious type, I looked up the name "Chinooky." Since it is part of the "California Colors" my guess was that it was going to be a type of wine. I was wrong. It is a kind of salmon or a type of wind. Both named after the Chinook native people from the Pacific Northwest.

Apparently, the Chinook winds create some pretty amazing sunsets.

A little decorating and a little learning- not bad for a days work.

Hope you are enjoying your day!

PS: I am linking up to Frugal Friday with The Shabby Nest because this makeover cost me a whopping $12 for the paint and $1 for the board!

Monday, January 10, 2011

Fan Mail

After 14 days all comments go to comment moderation. This came to me for approval today and it made me laugh out loud. At first I pressed "publish" and then I decided that a gem like this deserves it's own post.
 
Dave said...
Dear god you managed to paint a very small kitchen appliance with black paint and everyone thinks you are a cross between Rodin and L da Vinci. And just look at the intellectual brilliance of the comments of your followers. Quote - Okay, you TOTALLY sprayed that crock pot! It looks awesome! endquote. I think you need to get out more and perhaps learn to appreciate slightly more challenging projects. By the way projects cannot be "on hiatus" - first of all hiatus is a noun and secondly.... oh I just can't be bothered to suggest how you might learn to write grammatically correct and logical English. Toodle pip - perhaps next time you could write up "How I tied pretty ribbons around my saucepan handles"
What a funny crack about my crock. Toodle pip! The original crock pot painting post is here

Saturday, January 8, 2011

Rainy Day Crafting-Fabric Twist Ties

 There has been a lot of cold rain here in LA lately-perfect for indoor crafting.

First up, the Fabric Twist Ties from my Crafty Goals list.

True to my form, I didn't follow the lovely tutorial and used what I had.  The tutorial calls for fabric glue, but I used heavy duty fusible web. The thin wire came from the dollar store.
 Basically, you just sandwich the wire between two layers of fabric each with fusible webbing ironed on.

 I bent the end of the wire so that it wouldn't be sharp. I didn't measure and made an assortment of sizes.
The official tutorial has a template to get pretty leaf shaped endings. I used pinking shears and winged it. I had fun coming up with coordinating scraps. In a matter of minutes I had made a half dozen of these to stock my gift wrap drawer.

Wishing you a happy day!