Tuesday, July 28, 2009

Make Your Own Shrinky Dinks

I am in a bit of a crafty rut right now. The truth is, my apartment is pretty clean from all our company and I am hesitant to get messy creative. So this is actually a repeat craft from my teaching blog. This project was a hit with my third and fourth graders and frankly, my friends too. Who isn't a bit nostalgic about Shrinky Dinks?
<span class=
Recycled Plastic Shrinky Dinks
Supplies:
Toaster Oven
tongs
tin foil
Sharpie markers
spatula
No. 6 or 7 recycled plastic
scissors (Fiskers kids scissors worked great)
hole punch


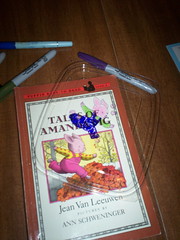
1. Start with plastic that has either a 6 or 7 in the recycle triangle. Salad bar containers and bakery goods often come in this kind of plastic. We used the lids from salad containers.

2. We used Sharpies, but any permanent marker would work.
Recycled Shrink Art
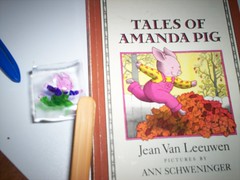
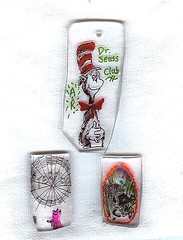
We traced some of our favorite book characters with Sharpies, but you can draw anything!

Shrink Art in the Oven
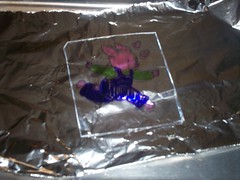
3. After drawing, cut out the design and use a hole punch to make a hole. Then place your design on some tin foil. We cooked ours in the toaster oven. There are some fumes, so you may want to consider opening a window or taking the toaster oven outside.

4. Bake the shrinky dink for about 2 minutes at 200 degrees. It's fun to watch! It will curl and look all messed up, but then like magic it will uncurl too. When it's flat again, it's done!

5. Caution! They will be very hot at first! Have an adult use the spatula or tongs to remove the shrinky dink from the foil! Let cool for a few minutes before letting the kiddies touch them.

After: finished shrink art

A Few Amulets

My students sewed their charms on these "Success Bags" where they collected mementos from the school year.

More Trash to Treasure at Reinvented!


Thursday, July 23, 2009

DIY Thursday- Children's Art Book

A few weeks ago I went to my girlfriends Lisa's house down in the OC. She raved about the school her daughter attends and especially their art program. Then she shared her three year old daughter's art work with me.
Bella's Van Gough
Here's her version of Starry Night. Can you believe it! How fabulous is this?
The problem my friend worried, was how to display and honor the art.
Bella's Monet
Here is B's Water Lillies.

I told her not to worry and headed off with the portfolio.
Bella's Matisse

I brought the art home and scanned or photographed each piece.
Bella's Sunflowers
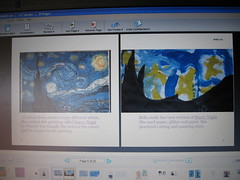
Then I uploaded each picture into a blurb book. I added simple text to go with each picture.
For example "This is B's painting of Sunflowers. Van Gough painted Sunflowers too. They both used a lot of yellow and orange in their paintings."

IMG_1063
This is a sample page on the computer. This is the preview mode and you can see how the pages will look. I assure you Blurb is super easy!
Jackson's Scribbles
For the extra large paintings I photographed B holding her art.
IMG_1103
I also included some of her craft projects like this shell pine cone tree.

Then I tried to interview her about art. That was interesting! I did get a few funny quotes to add. For example she likes to use all the colors, but "edamame green" is her favorite.

Anyway, when completed, Lisa will be able to log onto my "blurb store" and order as many copies of the book as she would like. They start at about $20. She can order a hardcover for B and soft covers for the grandparents. There are a lot of options to customize a book.

This will be my third blurb book and I can not stress what a great product it is! Blurb books- easy DIY heirlooms!

For more DIY check out Kimba's DIY Day!

Wednesday, July 22, 2009

A Kitchen Business Perhaps

Hollywood UMC from Highland
Hello!

We have had company for the last few days which has meant I needed to keep the apartment clean. This has put a halt to all creative endeavors for a bit. Tons of ideas in my head though, so stay tuned.

This week I listed the Simple Blue Kitchen on the Los Angeles Craigslist. While I have yet to sell it, I did receive this email which I thought could be really interesting.

"I just have to tell you you are doing a great job with the play kitchens. The black one you sold was awesome I wanted to buy it but I was not able to take the time to go pick it up. I liked it a lot. I am a preschool teacher and a mother of a little girl. How fun to have one. I have a cabinet that I think would work out to be similar to your last one. What would be the price? What a great ministry. Thanks!"

I guess it sort of is becoming a ministry. I am a big believer in abundance thinking. I believe that when we pray to God and row for the shore, our needs will be provided. So far, I have found all three cabinets for free. Now it seems that that good Lord is actually sending the cabinets and the customers to me!

Speaking of ministry, if you live in Los Angeles and are looking for a church home, please feel welcome at Hollywood UMC. If you are ineterested in visiting, email me. I would love to meet you!

Thursday, July 16, 2009

Kreativ Blogger Award!


Thank you to Patti from My Creative Mind for nominating me for the Kreativ Blogger Award!

Here are the RULES for this AWARD:
1. Thank the person who nominated you for this award.
2. Copy the logo and place it on your blog.
3. Link to the person who nominated you for this award.
4. Name 7 things about yourself that people might find interesting.

Here are my 7 things.........
1. I love teaching in the ghetto, but if I didn't teach, I would like to be a carpenter like Amy Wynn.

2. I think Twizlers are a perfect food, although since moving to CA, I have learned to embrace and appreciate their cousin Red Vines.

3. I *love* my GYN. When I moved here I went to a very famous, but frankly ho hum practice where I felt like a small number. Switching to Dr. Dwight has been life changing! I wish every woman had a doctor as wonderful. If you google Dr. Mark Dwight -Los Angeles, you will find that I am not alone in this opinion. (For you Angelinos-this is the best tip of the day!) If you are not with a doctor you love switch!

4. My most favorite project of this year: Molly Monkey. I have made them three times and especially love my Molly Monkey twins.

5. I have a really hard time throwing things away. It's almost painful if I think it could be recycled, repurposed, or regifted. I get this from my Grandparents. It makes me miss them a lot.

6. My favorite bible verse is Matthew 25:40.

7. My new favorite thing is Hulu.com. I love watching Jon Stewart, Bob Newhart, and Hill Street Blues.

5. Nominate some Kreativ Bloggers: (Sorry! It's late and three seems just right!)
Chester and Donkey
The Procrastinator Crafter
Hogwash


Wednesday, July 15, 2009

DYI: Simple Blue Kitchen


From this:
Small chest
To this:
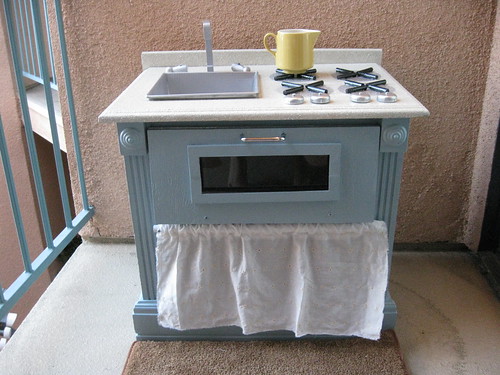
Simple Blue Kitchen

This is my third "free curbside cabinet" to play kitchen makeover. Once again, I used Stone spray paint for a granite looking counter top. This time the color was "Bleached Stone." I was waiting for my free paint sample from Glidden, but alas, it hasn't arrived yet. I saw this pretty Glidden "Sea Spray" on the mis-tint shelf at Home Depot and took it home for a dollar. I have tons left and plans for it.

This time I decided to stretch myself by making a window in the oven door. I even bought two power saws! (Scary! Loud! Not as fun as a drill!) That's an old acrylic poster frame for the glass.
Oven Window

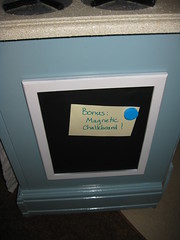
I also turned a rusty old baking sheet (free at the curb with this cabinet) into a magnetic chalkboard! Would you believe I used regular Pampered Chef kitchen scissors to cut the metal?!
Magnetic Chalkboard
I wrote up detailed directions for this kitchen here. You can see the others here. This kitchen will be sold on craigslist to raise money for the homeless lunch program at my church.

I hope this inspires you to think about that stuff on the curb in new ways! For more DIY inspiration head over to ASPTL and Transformation Thursday at the Shabby Chic Cottage!

DYI: Simple Blue Kitchen Directions

Simple Blue Kitchen
This was my easiest kitchen yet! Yes, with three down, I have learned a few tricks, and I did have a lot of supplies on hand. However, the drawer format was especially easy. Not counting the two saws I bought, this kitchen went together pretty cheap too. Consumable supplies were about $26, I didn't count the sealant because I have nearly a whole can left. I hope to sell if for $100 for the homeless program at my church.
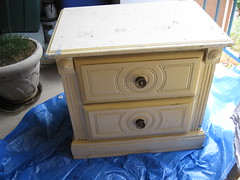
Small chest
Step 1- Start off with an unloved dresser. Take out the drawers. In this chest there was just cardboard separating the two levels between the drawers. I used that as a template for the plywood shelf. Remove drawer slides and any staples or other bits in there.

Step 2 - Shop for supplies

Home Depot:
plywood sheet $5 (they cut it to size for the shelf and two pieces for the oven door)
handle for oven door $0.99
round insert cups (for the bottom of chair legs) for oven knobs $2.99
Chair Bottom Things for Knobs
paint for cabinet part- Home Depot mis-tint shelf!! $1

Giant Dollar (I am always surprised and thrilled by the hardware aisle at dollar stores.)
hinges $1
foam paint rollers $1
extra screws $1
extra small screwdriver $1
two 8 1/2"X 12" wooden picture frame $1 each
small L brackets $1

Michaels
wooden letter "L" for faucet $1
small turnings for faucet handles $1

Osh
Stone spray paint $3.00 ( I got that great deal, this is usually about $8 and I usually buy it at Michaels with a coupon.)
Silver spray paint on sale $3.00
Handi Saw
Jig Saw

Local paint store
Zar Ultra Max Waterborne Oil Modified Polyurethane $18.99
I have used spray sealer in the past and love the ease, coverage and price, but it has a lot of fumes and so I decided to invest in a can of low VOC sealant. This had very little odor at all. I have tons left for future projects

Additional Stuff
baking sheet - free from the same craigslist curb alert as the cabinet
primer- from my stash
chalkboard paint-from my stash
white spray paint-from my stash
1 1/2" dowel -from my stash
thin dowel -from my stash
pan $2 from Goodwill
fabric for curtain from stash
bit of scrap 1"X2"
bit of plastic from old poster frame

Step 3. Trace "sink" and cut hole. I didn't always have a saw, here's how I "cut" the hole in the past.

Step 4. Draw and cut hole for oven window in both oven door pieces . Use first one to make template for the second board. Then measure the length of the oven door and cut the same length from 1"X 2". Use this to hold the hinges for the oven door. Cut a piece of plastic to fit and tape it on an inside door. Then screw everything together. The plastic is sandwiched between the two door pieces creating a window. Oven Door Construction

I then cut a wooden picture frame to trim out the windows rough edges. I glued this in place and clamped it until dry.
Oven Door

Step 4- Drill holes in wood turnings and the letter "L" for the faucets. Drill corresponding holes in the counter top. Drill holes in dowel for curtain rod.
Stove Top
Step 5- Do a dry assembly. There were places I braced for extra durability with mini L brackets or scrap wood.

Step 6- Take it apart to paint. It is much easier to paint the shelf to look like an oven when it is out in the open. You really must prime these. The stone spray must have a base color- I used white primer and it shows through. Wrap the base cabinet before you spray the stone counter top. I used saran wrap.

Step 7- Cut and paint dowels to make burners. Glue them on with wood glue.

Step 8-Seal everything well with sealant. The stone finish must be sealed with several coats or else it is a bit rough and flakey. With several coats it's nice and shiny like real stone counter tops.

Step 9- I decided to make a magnetic chalkboard. I cut a old baking sheet with my Handi saw just to get through the rim, then I used my Pampered Chef scissors to cut the rest! Yup! Love those scissors. I primed it and painted it with chalkboard paint and then put it in a wooden frame with a piece of plywood scrap to back it. I glued the whole thing on with the cabinet sitting on it's side until it dried.

Step 10- Reassemble- Make curtain by measuring opening and adding a bit for the pocket and so that it gathers.- Play!

I hope that you are inspired to make one for a child in your life or perhaps to donate to charity.
If you do, please send me pictures! I would *love* to see what you make!

I am submitting this for the Metamorphose Monday at Between Naps on the Porch! Head on over and check out the amazing transformations over there!
New Project & A Confession

A while back when I made this peg hanger thing
Drawer Front
out of a drawer front someone asked, "What will you do with the rest of the chest?"
Small chest
The balcony workshop has been open for business for about a week.

Balcony Workshop
Many of you probably already know what this project will be. As Dr. Phil says, "The best predictor of future behavior is the past." Full reveal tomorrow! I'm pretty excited about this one.

(Confession: My 20 something bar tending neighbor and her roommate of the month come home from the clubs at 4 am full of excitement about the boys they meet. They are not at all familiar with the concept of an "indoor voice." It's as if I am sleeping or trying to sleep in an episode of The Hills. I find strange comfort in thinking about how I will be using my HandiSaw at 10 am. Like totally.)

Tuesday, July 14, 2009

Trash to Treasure: Needs Advice!

So, last week I went to the Goodwill with chalkboards on my mind.
Christmas Gift <span class=
I was happy with this platter and the pineapple board.

Pineapple Chalkboard
I am still happy with the pineapple. It came out just as I wanted.
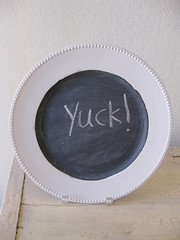
Not quite right plate chalkboard
But, the platter needs help! The edges were so hard to get neat with a foam brush. The white feels too stark. Should I paint the whole thing black? Does it need a ribbon or some other embellishment?

For better inspiration than this, head over to Kim's at Reinvented for some real treasures!

Edited to Add: I am including this post in 320* Sycamore's Week of Gifts! And I have since painted the whole plate with chalkboard paint and have a light blue ribbon to hang it with. It looks much better! No pics yet tho! However, I will be checking out all those other chalkboard posts to get more ideas!

Monday, July 13, 2009

Thrifty Treasures

A few weeks ago I went to a great estate sale in Burbank. I found it on Craigslist under the heading of "Estate Sale -tons of vintage sewing!"
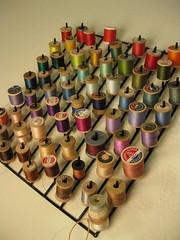
Wooden Spools

It was as if I was at my Grandmother Hatties house. I began talking to the granddaughter who was running the sale. We commented on the many similarities between our grandmothers who saved *everything*. This woman saved glass Windex bottles, tins, and every button and bobbin that ever crossed her path. There were many unopened toiletries. Powders and lotions- most likely gifts from the grandkids that were "too good to be used."
Saving Every Little Bit
This spool especially reminds me of my grandmother who would've saved those little bits of thread too.
Vintage Spools

I took home a bunch of thread and sewing notions, a few scraps of vintage fabric and some other odds and ends. My mother warned me that the thread might be too old to really use. So I was thrilled to find this wire thread rack for $0.99 this weekend at Salivation Army. Now I can just enjoy the rainbow of colors.

I am joining in ( a little late) at Southern Hoslitality for some Thrifty Treasures. Head over there to see all the wonderful treasures people find.

Wednesday, July 8, 2009

DYI: Scrapbook Paper Frames Tutorial

Last Christmas I went to a small gift shop with my sister-in-law and saw some picture frames I really liked. They were made of pretty papers and those magnetic picture things for your refrigerator. I thought (as all of you would've too) "I could make that!"
Finished Project

This is my completed frame with my cute hubby modeling. Since I knew I wanted to make a bunch of these frames I bought a scrapbook paper book on sale after Christmas.


Gather Supplies
Supplies
plywood scrap
Modge Podge
ribbon
magnetic or velcro acrylic picture frame
(I got mine at the $ store, but I am sure you can get them many places.)
picture hanger thingy
hot glue gun/sticks
drill (optional)

How To:
1. Sand the plywood. I also primed mine because I had a can of primer out already. I think this is probably optional. Also, I want to mention that you can get a small sheet of plywood at Lowes or Home Depot and they will cut it to size for you. Thin plywood is pretty cheap too.

3. Trace wood on to paper and cut paper to fit. Modge Podge the paper to the plywood as you like. I had a gap where my paper was too short, so I patched it with another color. If you need help with Modge Podge (as I did) here is a great tutorial.

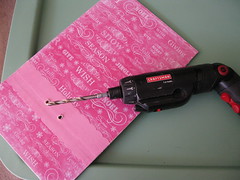
4. When everything is dry, eyeball where you want a bow (optional) and drill two holes. Insert the ribbon in the holes to form a simple bow. If you don't have a drill, come up with some other embellishment. The scrapbook section at craft stores have a wealth of potential doo dads for this kind of thing. I am using what I have today.
Drill Holes for Ribbon

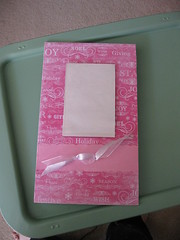
5. Hot glue the acrylic frame in place. Hot glue picture hanger thingy in place on the back.

Add Ribbon & Frame

I think these simple frames would make great hostess gifts. I plan to make a stash of them to have on hand this holiday season.

Now head on over to ASPTL for lots more DYI Day projects!


Then head on over to the Shabby Chic Cottage for Transformation Thursday. You will not want to miss her bench!

Christmas in July: Chalkboards

Peanuts Cookie Cutters  logo

For the past few years I have made the majority of my Christmas presents. It's a "kill two birds with one stone" thing. I get my creative therapy and usually also save some money on shopping. Mostly the savings comes from not going to the mall where I find myself buying gifts for family and friends as well as myself.

Christmas Gift Thrifting
Yesterday, inspired by all the great chalkboards at Reinvented and The Shabby Chic Cottage, I headed out to the Goodwill in search of trays to make into chalkboards.

The "silver" charger is actually plastic. It's a bit cheesy, but I think plastic is perfect for my friend Tammy* who has a household full o' wee ones.

The wooden pineapple tray was $3.99. I get really cheap at Goodwill and almost left this behind. Doh! $3.99 for a Christmas gift! Still a great deal. I bought some spray primer and of course, I have the chalkboard paint!

A couple of keys for Christmas crafting:

1. Start early! I have to travel at Christmas, if I waited until November or December to get this kind of thing done, it would be high pressure and not craft-therapy!

2. Shake it up! I think in some ways it would be easier to say, "This is the year of the apron! Everyone gets an apron!" but after my fifth apron I would be hating life. A variety of projects makes it fun. Just keep some sort of record of what you have made everyone.

3. Multiples save time and money- OK so take that last bit of advice with a grain of salt! I make my little cousins (ages 3-6) the same thing each year. One year they all got tote bags another year they all got travel quilts. Last year all the women in Cliff's family all got heat therapy bags.

This is a photo set of the Christmas presents I have made in the past.

Oh, and maybe you noticed that adorable vintage sitting Santa. Yeah, that's a present for me. At least he was just $1.99 at Goodwill.


*I'm rereading the Sweet Potato Queens' Big A-- Cookbook. It's a total crack up.

Tuesday, July 7, 2009

Trash to Treasure: Drawer Front Coat Rack

Last week inspiration and supplies met in such a timely way. On Monday, I got this little dresser for free at a very cool Craigslist "curb alert."

Small chest

Then on Wednesday I was inspired by these drawer front hangers on Design Sponge.


Lucky for me, I just happen to have an extra drawer, some power tools, and a bag full of bits and bobs from old projects !
Drawer Front

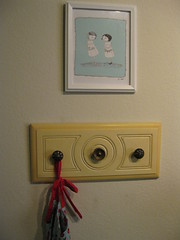
First I used the Handisaw to cut off the drawer front. It worked fine. Then cleaned up the back a bit. I happen to have two knobs left over from this old dresser. (Maybe someday I will switch them out for some cool Anthro knobs, but so far this is a completely free project.) I carefully measured and drilled holes for two more knobs. I added a picture hanger thingy to the back and scrubbed the whole thing with a Mr. Clean Sponge.

Voila!
IMG_1079

For now I like the yellows, though I am thinking of many other places and colors this could go.
Drawer Front Hanger

If you are a fan of DYI makeovers of all sorts of things, check:
Trash to Treasure at Reinvented

Monday, July 6, 2009

Updates On A Few Projects

Glass Jar with Reusable Makeup Remover Pads
First up, I am loving my reusable makeup remover pads. In fact, a bag full is in the wash right now. The system of using them and then putting them in the collection bag is working great. I haven't run out and they get softer with each use. Amazingly, the mascara stains wash right out each time.

Next, the saws. That's right, plural. This Handisaw didn't do what I needed it to do, so I ended up going back and buying a small jigsaw too. Now I have two saws. They are both good for some things, but not everything. I really wanted to love a saw the way I love my drill. These saws are both loud and scary. Not loving saws.


TV Tray Makeover
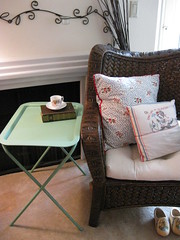
The green table is awesome! Right now it's my laptop desk, but the uses are endless and I will forever be looking for more of these simple, lightweight gems.
On the Back

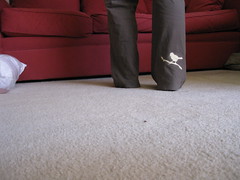
The painted yoga pants are holding up OK. I do wear them and they look fine. Cliff really likes them, but I am disappointed by the quality of the paint. I used a fabric paint medium mixed with craft paint and it's getting a bit cracked and stiff with wear. Next time, I will absolutely spring for real fabric paint.
Small chest
This is one of the free things I got from the Craigslist haul of last week. It should be ready for a reveal sometime this week!