Showing posts with label Trash To Treasure With Reinvented. Show all posts

Monday, May 17, 2010

Trash to Treasure: Pajama Top Apron

PJ Top to Apron

I found this pajama top at the Goodwill. I loved the fabric right away and knew it would make a terrific apron. I know, there are already a thousand apron tutorials in the big world wide web. Now there's another.

Really though, pajama tops are perfect. Pajamas come in the best prints. While my pajama bottoms are worn thin, my pajama tops are always neglected in favor of a tank top. They get hardly any use. Many pajama tops have big pockets and the bottom is already hemmed. Also, at our So. Cal Goodwill, pajama tops are just a buck.


Quick and Easy Trash to Treasure Pajama Top Apron

Supplies:
A pajama top- the one I used was a medium and it was plenty big enough.
Thread and any other embelishments you like. I used some pom pom trim I had.
One spool of grosgrain ribbon for the ties. Or if you like, you could also use other fabric for the ties. Since making the ties is my least favorite part of making an apron I opted for ribbon.

Directions:
1. Cut the bottom off the top.
Cutting the Pajama Top
I cut right below the armpits.
 
2. Add trim to the bottom if you choose. I added some pom-pom trim to the already hemmed bottom.

3. Gather the raw edge top. You can sew a loose basting type stitch and then pull the tread to gather as I did. Or you could pleat it and sew across. I also sewed a tight stitch across my gathers to secure them.
Gathered Skirt
4. Once you have gathered your top edge, measure to see how long the top is. Mine was about 20" long. So I cut a strip about 4" X 20" from one of the sleeves to use as a waistband.

5.Sew the waistband right side facing the wrong side of your gathered edge fabric. I know that is hard to explain, but after you sew the right side of the waistband to the wrong side of the fabric, you should be able to fold it up like this:
Waistband Step 3
6. Iron a bit of a hem to the top edge as shown above. Then fold down the waistband so that it now looks correct and matches the front of the apron like this:
Pinning Waistband
7. Pin the waistband in place. Make sure to cover any of the gathering basted stitches. and top stitch it in place close to the edge.

8. Pin the ribbon so that it is centered on the waistband. Then sew it across the waistband. Be sure to sew some extra stitches at either end so it is good and secure.
Ribbon Ties
I like my ties to wrap around and tie in front. Ribbon makes this so easy to do.

9. Trim any loose threads.
 PJ Apron
10. Pose for blog pictures.

How easy was that? Really, steps 9 & 10 are fluff. This is a quick project!

Oh and one last thing, you can still vote for my lemonade stand!
Lemonade Stand

I am sharing this at Reinvented for Trash to Treasure Tuesday!


Monday, April 26, 2010

From the Archives- Trash to Treasure Purse Revamp

I am in the midst of a *very* busy season coupled with an allergy attack. So, I thought, how about one from the archives.
Paris Swap Bag
This purse was one of my very favorite trash to treasure projects. It was made for a Paris themed swap and originally posted in May of 2008.. Hope you enjoy!


Thrifted Purse Trash to Treasure
I don't have cable so my HGTV viewing is pretty limited to hotels and my parents house. Still, I do love me some H&G. I have fond memories of one show in particular where they try to recreate a designer room on a budget. It was Sensible Chic and every show starts with an "inspiration room."

Well, welcome to Sensible Chic -The Purse Challenge Edition

While in Santa Fe, I had the Springtime In Paris Swap on my mind. For one thing, our hotel had a sweet French cafe and so did every other corner. Pâtisserie reminds me of Paris in the spring or really, any other season.

In one fancy French shop I spotted this Vera Bradley bag:We'll call this the "inspiration bag."

Now, Vera Bradley bags took up a whole wall of the fancy French shop and frankly, the prints on most of her bags heavily resemble many of the French provincial linens in the store.

See for yourself: French Provincial Linens VS Vera Bradley Fabric Collection.

Turns out Vera Bradley is a company from Fort Wayne, Indiana. Très Américain!

Anyway, while studying this bag I noticed that it's construction wasn't too challenging. I made a mental note to keep an eye out in thrift stores for a basket like bag. Maybe for the swap project?

In California we call making mental notes "manifesting." It's about sending our intentions out to the universe.

Well, like clockwork I manifested a potential bag at GoodWill Santa Fe.

Groovy Plastic Canvas Embroidered Bag

The first step was to cut off dear someone's Aunt's embroidered handiwork. Credit where credit is due, those were some beautifully even stitches. Also, adhered like nails to the basket.

Thankfully I remembered a Pampered Chef demonstration where the kitchen shears had cut a penny. Even with the wonder scissors it took a lot of effort to cut this band of iron clad embroidery.

Gross plastic 
lining
Inside was a seriously gross and dirty shower curtain type lining.

Bag Disembodied

Free at last!

Getting the old, discolored hot glue out of the basket weave was another story. I felt like a dentist and the patient had a serious tarter problem.

Another challenge was deciding weather or not to save the grody lining. (I haven't said "grody" since 8th grade, but when a word fits, use it.) I wanted to toss it quick, but it did make a perfect pattern for the new clean, crisp light blue cotton lining.

Paris Swap Bag

I had planned on looking around for some provincial style napkins or something to Frenchify the bag a bit more, but then I opted to just use some stuff from my stash.

I machine quilted the black and white print on the diagonal. Although the inspiration bag also has quilting, I did this to give it a "Chanel feel." It's a subtle nod to real French design.

Paris Swap Bag

In the end, inspiration bag $57 "Sensible Chic" bag $3. Quelle affaire !

Check out more Trash to Treasure with Reinvented!

Monday, February 8, 2010

Tutorial:Chalkboard Valentines with Sweet Book Page Ruffles

Trends of '09
-Chalkboards
-Text & old books
-Ruffles
Chalkboard Valentines
Check! Check! Check! Got them all into my valentines for Sarah's Sweetheart Swap! I actually did this shortly after New Years in anticipation of a busy Valentines season and it's been burning a hole in my pocket ever since. I had to share it with you all today!
Chalkboard Valentine
Here's how I made them:

Supplies:
 2" squares of old book.
plain cardboard
chalkboard paint
chalk
ribbon scrap
heart shaped cookie cutter
hot glue gun
pinking scissors
pen

I had tons of these 2" squares leftover from this project. Goodness knows I couldn't just throw all those little bits of perfectly aged text away! I also had a great cardboard box to recycle. My heart cookie cutter was about 4" wide.
Cardboard Getting A Coat of Chalkboard Paint
First paint the cardboard with the chalkboard paint and allow it to dry. Then cut out two hearts.
Dozens of Paper Rolls
Next roll those squares around a pen and secure with a dot of hot glue. Dot. Dot. Not a lot! (Sorry! Couldn't resist a little teacher talk.) It takes nearly 30 rolls to really cover one heart.
Gluing Tubes to Heart

Gluing Tubes to Heart
Really jam them in tight.
Gluing the Tubes

Then glue a second layer to fill in the gaps at the curves and the point.
Tubes all the Way Around
Next, glue your ribbon bit to the second heart and load that baby up with hot glue.
Ric Rac Hanger
Tubes Sandwitched
Now, carefully feel for the points and the curves on the back and sandwich the two layers together. This is a bit tricky.
Trim
Trim around as evenly as possible with the pinking scissors. This part was is not a perfect science. One side looked better than the other.

Rub chalk all over both sides and wipe off. This will give it that great chalkboard patina.
Chalkboard Valentine
Write your Valentine a message. Something short and sweet.
This might be my favorite Valentine yet!
Valentine '09
Valentine '08

I have been thinking of making one that is wreath size.

If you make these, please send me a link or a picture! I'd love to see what you do with this idea.
Linking to:
DIY Day
Trash to Treasure @ Reinvented

Monday, January 18, 2010

Trash To Treasure: Burlap Pool Noodle Wreath


My pool noodle wreath is done!

But friends, we need to have a talk...

All across blogland there are a plethora beautiful burlap projects. For the longest time I resisted this trend because for the most part burlap doesn't mesh with my vintage stuff. Plus I like a lot of color.

But the great projects kept coming and I was seduced by these ornaments, chair covers, pillows...

I caved and bought some burlap at one of the Joanne's before Christmas sales.

It was an impulse buy. It smelled funny and was kinda rough. I had no real plans for it. So I tucked it away for a rainy day.

It rained when I saw this wreath! Friends, burlap actually goes with my poopy door! All was right with my crafty world... until I started cutting!

Why have none of you burlap lovers posted of the tremendous fuzz? You have made burlap seem dreamy!
IMG_1917

Look I am covered in burlap fur! It's so much worse than cat fur. At least cat fur comes from a soft loveable kitty! This stuff clings to everything! It makes me itch. Oh, and when first I started, I was sitting on my bed cutting away. Let's not talk about how many lint roller sheets it took to clean up that mess.

So is there something I am missing?  Can you prewash this stuff for a less fuzzy experience? Or is this the price for burlap beauty?
Burlap Wreath
Ok, now I am done with that rant. Trash to treasure!

This wreath was made using a pool noodle! I also used lots of scraps that were clothes in their former lives.If you look closely you can see bits of Cliff's jeans. Not too long ago he brought me a holey pair and asked me if I wanted to make something of them. Then when I pulled them out for this project he said, "Oh that's where my good ripped jeans went." I guess he wanted to wear them to the Sonic Youth Concert last week, but forgot that he had already donated them to me. I am just proud of him for thinking of crafty potential before chucking his ripped jeans.

I used a simplified version of this flower tutorial and secured the flowers to the wreath with regular sewing straight pins. When I tire of this look I can pull them all out and start fresh with something else.

One more thing! *My Citra-Solv giveaway is here!

More trash to treasure inspiration at Reinvented!
Lots of DIY at ASPTL !


DIY Day @ ASPTL

Monday, December 7, 2009

DYI Ornament Party: Spool Ornaments


I sew a lot and constantly run out of thread. Since I can not throw a single thing away-ever-, I have saved every plastic spool.

I happen to have a box full of wooden spools that my grandmother (who also could not throw a thing away-it truly is a genetic disorder) saved for me. As a child I would play with those spools in so many ways. Mostly they were stools for my Barbies. My former kindergarten students used the wooden spools in block center. Wooden spools are worth saving.

But what to do with those plastic ones?


Spool Ornaments
Voila! Christmas ornaments! The tiny trees came from a garage sale, but I am sure that Hobby Lobby or Michael's probably has them too. I bleached some of my trees to make them white and then rolled them in clear glitter to make them a little shiny. The gold "ornaments" are tiny brads used for scrapbooking.  I used scrap paper, ribbon, and odds and ends to decorate the spools.
Spool Ornaments
Here are two more traditional ones. See, I have even joined in on the burlap craze. (Gotta say, I don't like the smell and the neutral color just doesn't do it for me like bright colors do. Tried to love burlap, not there yet.)

I used quilting thread to make hangers. These were totally addictive!

I'm headed over to Centsational Girl to see everyone's ideas! Come along!
Centsational Girl


And you know, when I have trash... I link up to Reinvented's Trash to Treasure!

Monday, November 30, 2009

Bragging About My Trash To Treasure: Altered Wine Bottle

I have been so inspired by these altered bottles on Restyled Home.  Then I discovered this altered bottle flickr set. And when I discovered (where have I been?) the Graphics Fairy, it was all over.
Altered Wine Bottle
You can click on the pictures to get a better look.

Over Thanksgiving weekend I had the time to get creative and try new things. This picture hardly does the bottle justice.

I wake up early. I usually leave for work around 6:30 am, so sleeping in is still early. Anyway, in the quiet of the dark morning, at an hour most Hollywood folks never see, I crept into the upper garage and went through the building's glass recycling bin looking for the perfect wine bottle. The feasting of the previous days left me with lots to choose from! Thankfully nobody caught me.

I soaked the labels for a while and scraped them off. A little dab of Citra-Solv and all that sticky stuff was gone. (Citra-Solv works much better than Goo Gone and smells so good!)

I quick visit to the Graphics Fairy for this and this and I was on my way. Unfortunately, I am out of color ink for my printer. Sometimes these kind of limits are helpful though. With all the amazing clip art at GF, color ink would have made it harder to choose an image! Frankly, I probably won't replace that ink cartridge any time soon. For the same price, I enjoyed some yummy sushi the other night and sushi will always trump ink in my book.
Altered Wine Bottle Back


This is the back.


Anyway, Modge Podge, Martha Stewart Cristal Fine White Glitter, ribbon and some Christmas picks from Joannes and I had my bottle! This would make such a nice hostess gift for wine loving friends. I am sure to make more of these! I have ideas to make a bottle for wishes, a bottle for Love Potion # 9 and maybe some birthday bottles. The possibilities are endless and the price is so right!

 
Check out all the creative things people do with her images here.
Check back on Tuesday for more Trash to Treasure at Reinvented.

Monday, November 23, 2009

Scrap Paper Doll Kits

This trash...
Scraps
made the scrap fabric alphabet I shared yesterday (with a giveaway)... and generated even smaller scraps which I  recycled into a little Hanukkah gift for my dear friend Bella.

Scrap Paper Dolls
Again this isn't an original idea, I was inspired by Carrie at This Mama Makes Stuff. I made my own paper doll templates so that I could have boys, girls, even a kitty and a pup.
Get my paper doll templates here.  I made about 5 copies of each paper doll on card stock. Then I bagged up those small scraps and some fancy bits and bobs.  I put everything in a gift bag and stapled a sample/ label to the bag.

This is going to be my go-to kiddie gift this Christmas. My "Florida Four" ages 4-7 are getting one too. I hope to find just the right box for theirs.

I'm linking up with Kim for Trash to Treasure.


Monday, October 26, 2009

Curb Alert Coffee Table Makeover, Purdy Paintbrush Review & Giveaway!


Lots going on here today. DYI, paint brush talk, wait for it.... Purdy Paintbrush giveaway!

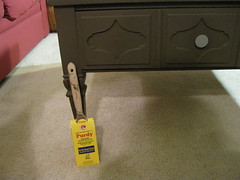
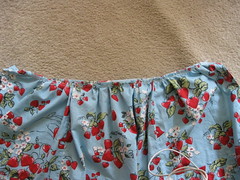
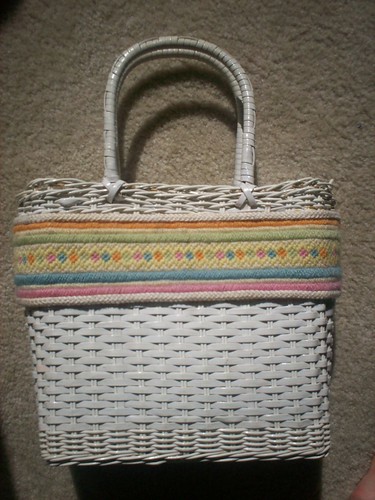
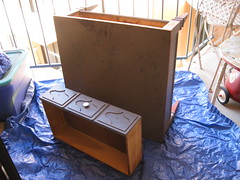
First up a good n' thrifty DIY transformation. This coffee table that I got for free at a craigslist "curb alert" was a hot mess with several layers of scratched up drippy paint. The "thingy" that helps the drawer slide smoothly was broken and jerry-rigged with just a few nails.

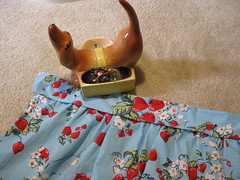
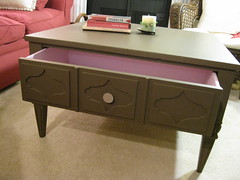
Voila! The color is Beach House Brown by Dutch Boy. Five bucks and change for a sample sized container that has plenty left over after three coats.


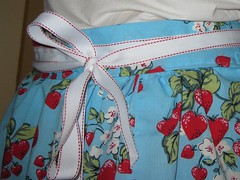
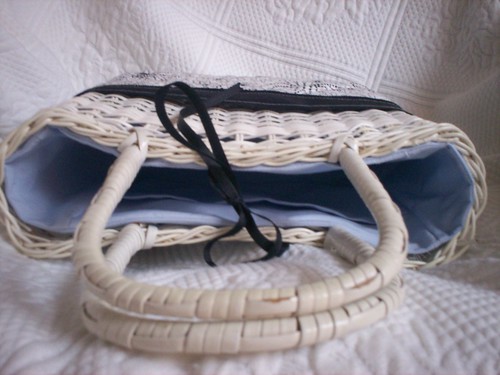
Here's a sassy little pink drawer just because. Now that I have discovered the pick me up of a shot of color in a drawer, I don't think I'll ever have a naked drawer again. The pink is leftover paint from the pink kitchen.
I love it so much I am tempted to keep it, but I won't because it's for my dear Ms. S at school. Total cost- $5!

Next up- Purdy Paintbrush review and story along the way. So, a month or so ago I entered a drawing for a Purdy paintbrush on another DIY blog. I commented that I had spent much time picking out paint brush hairs from my project. I didn't win the contest, but to my surprise the Purdy people wrote to me and offered me a trial brush and roller set! Whoo hoo!

Meanwhile back at the ranch, I went garage saling one Saturday and found a Purdy paintbrush for sale. This was before I recieved trial kit in the mail. I was checking it out when the seller told me that it "was the kind the pros use." So we got to talking. The man's father was a professional painter much like my husband's grandfather and he was cleaning out his garage. After a while I just had to buy the paintbrush. It was a steal at $5. Since I don't have any walls to paint, I have decided to test the garage sale brush and offer the roller and brush pack as a giveaway. Read on for more details.

This past weekend- the coffee table project was my first chance to try out a Purdy brush. I prepared to prime the coffee table. I wish I could say that I sanded the whole thing lovingly. Or at all. But I barely did. I don't really trust old paint to be safe, so I just sand the worst of the drips and prime away. My usual dollar store paint brushes shed and shed and I pick and pick.The upside, they are disposable and cleanup is a breeze. Remember, I don't have a garage and have to clean up in the kitchen sink.

The Purdy brush shed exactly one hair on the first stroke and not another. Not one other hair shed through one coat of  primer and three coats of paint! That right there is worth the price! And I mean the real price not the garage sale price. (Although if you should be so lucky to find a Purdy brush at a garage sale snatch that brush and don't look back!)

I did have a major problem. I held off painting for several weeks while LA had a heat wave. Finally on Saturday the weather girl predicted a "cooling trend" of just 80 degrees. I got started early so it would be cooler, but by the time I was mid deep in primer- a the suns rays came laser straight to my balcony workshop and created what can only be described as a solar oven. I could not paint fast enough!

When I was done and went to wash my brush I was reminded of the other reviews of Purdy brushes and was looking for tons of paint to wash out. Nothing came. Nothing! My latex primer baked onto the bristles of my precious brush! Turns out it was a "quick dry formula" I'll say! I seriously wanted to cry. Thankfully, the Purdy packaging mentioned brushing the brush if you use oil paint so I decided the brush could handle a good scrub.


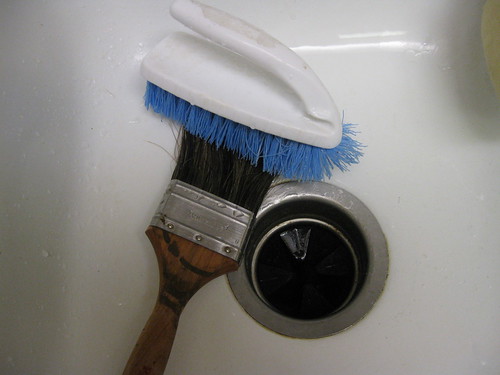
 I washed it in hot water, soaked it, and S-C-R-U-B-B-E-D it hard! I was like Lady Macbeth with that brush! Out, out damn paint! Slowly but surely the paint crumbled and came off.

Too bad I didn't just check Purdy's awesome "Help from the Paint Doctor" page. My very same situation is addressed and The Paint Doctor reccommends using a green scrub pad.

How many hairs were shed over this incident? Maybe ten. Maybe. I counted them as I noticed them coming out, but very few came out in the bursts of hard scrubbing I gave it.
 
Here is an after picture. You can see that some primer still remained. But as we say in Hollywood, "The show must go on."

I waited till dusk to paint the brown. Finally, it was truly a "cooling trend."

The Purdy paintbrush stood the test of the scrub brush and was completely shed free. I greatly enjoyed the absorbancy of this brush on the sunken drawer detail. Those bristles soaked up excess paint in the grooves so well.
 
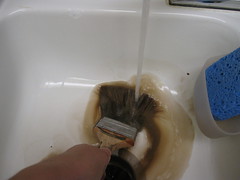
This is what I like to see! Liquid paint washing out like a dream. Whew!

A few hours later I painted the pink drawer and again painting was shed free and clean up was easy.

I will never use oil paint as long as I am an apartment dweller. I already push the limits by painting and sawing and such on my 3' X 6' balcony. So, I can't tell you how the brush handles with those elements.However, for regular latex paint -painted in normal Earthly temperatures, clean up was a breeze.

Even though I am cheap super thrifty...in the end I am sold on Purdy paintbrushes.  They are made in the USA which feels really good. In fact they are made right here on the west coast in Oregon. Clearly from my review you can see they can take some real abuse. I  am far enough along on my DIY journet to see my tools as an investment. I am happy to have a brush on hand that can wash up and return to duty quickly. I can see this brush lasting a long time and maybe even saving money in the long run. At the very least it made painting much easier and more enjoyable- and isn't that what a hobby is all about?


So, here we are finally at the giveaway! Thanks for sticking around! Would you like to win a Purdy Paintbrush and Roller? Just leave a comment and I  will do a drawing on Sunday.


DIY Day @ ASPTL