Trends of '09
-Chalkboards
-Text & old books
-Ruffles

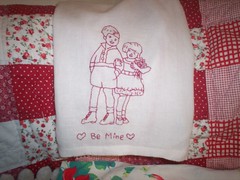
Check! Check! Check! Got them all into my valentines for Sarah's Sweetheart Swap! I actually did this shortly after New Years in anticipation of a busy Valentines season and it's been burning a hole in my pocket ever since. I had to share it with you all today!
Here's how I made them:
Supplies:
2" squares of old book.
plain cardboard
chalkboard paint
chalk
ribbon scrap
heart shaped cookie cutter
hot glue gun
pinking scissors
pen
I had tons of these 2" squares leftover from
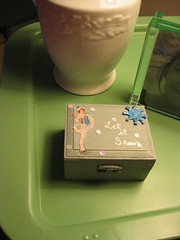
this project. Goodness knows I couldn't just throw all those little bits of perfectly aged text away! I also had a great cardboard box to recycle. My heart cookie cutter was about 4" wide.
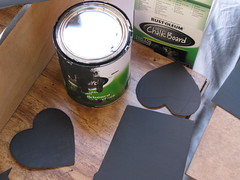
First paint the cardboard with the chalkboard paint and allow it to dry. Then cut out two hearts.

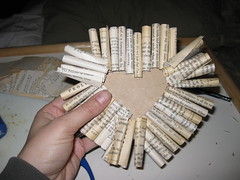
Next roll those squares around a pen and secure with a dot of hot glue. Dot. Dot. Not a lot! (Sorry! Couldn't resist a little teacher talk.) It takes nearly 30 rolls to really cover one heart.
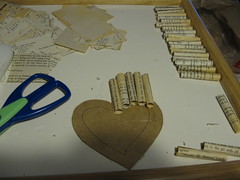

Really jam them in tight.
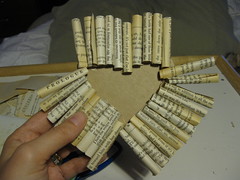
Then glue a second layer to fill in the gaps at the curves and the point.
Next, glue your ribbon bit to the second heart and load that baby up with hot glue.
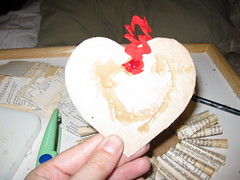
Now, carefully feel for the points and the curves on the back and sandwich the two layers together. This is a bit tricky.
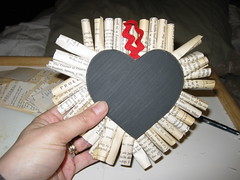
Trim around as evenly as possible with the pinking scissors. This part was is not a perfect science. One side looked better than the other.
Rub chalk all over both sides and wipe off. This will give it that great chalkboard patina.
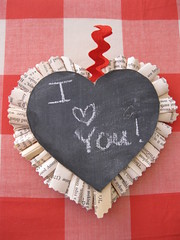
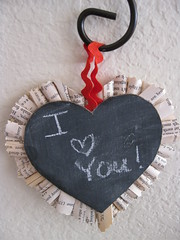
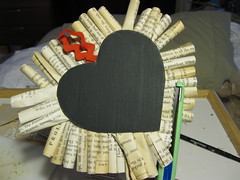
Write your Valentine a message. Something short and sweet.
This might be my favorite Valentine yet!
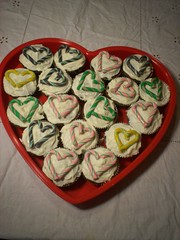
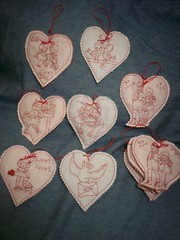
Valentine '09
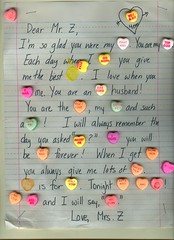
Valentine '08
I have been thinking of making one that is wreath size.
If you make these, please send me a link or a picture! I'd love to see what you do with this idea.
Linking to:
DIY Day
Trash to Treasure @ Reinvented


