Thursday, December 30, 2010

Craft Goals for 2011

My google reader page runneth over with "Stared" items. It's so easy to say, "Oooh I'd like to make that and just click, "star". How many do I actually get to?

I decided to kill some time before Christmas (when I should have been cleaning or packing) going through those projects. Many no longer inspire me and I was able to delete them. Many more made this overly ambitious list.  Here are a few of the projects I hope to tackle in 2011.

Just for fun:
Hello Kitty Floral bouquet from Zakka Life.
Modern Garland by Sweet Sweet Life 
This is the year I make a Dia De Los Muertos shrine.
Patchwork string  and fabric twist ties
Jewelry Organizer
Cherry Blossom Branch
Now that I have a ruffler foot, maybe I'll make a petticoat.
Or maybe this skirt.
Love these twig pushpins!


Smaller Projects
One Word Canvas - By Joy's Hope

Sewing Machine Cover
Felt PB Knockoff Pillows - Someday Crafts
Copy Cat Scarf by Cluck Cluck Sew
I still love this Scrap Buster Fall Pillow. It was on my 2010 list too. 

Christmas & Gift Ideas
Silent Night Pillows-The Shabby Nest
KitchenAid Mixer Cover-by Heart of Mary
Magnet Gift Tags- Tatertots & Jello
Giant Craft Stick Snowflakes


Bigger Projects

A headboard for us.
Roadkill Rescue Headboard
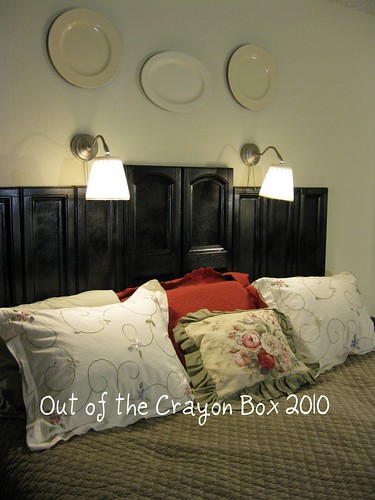
I loved this Roadkill Rescue at the time, but I am not feeling it in our new apartment. I am searching craigslist and also considering some DIY options like:
DIY Fabric Covered Headboard
Scrap Wood Headboard
Simple Tufted Headboard

Slipcover a chair ala Shelly

Getting a pup! And, if you give a girl a puppy she will need to make it a  a dog bed! ( I have a curbside end table ready to got!  A coat!  And a leash!
 We hope to adopt a shelter dog this year. I'd love to get a Chiweenie. We'll see!

I'd like to make this bed for the guest room when my dad is here in January.

Auntie Projects
Pleated Baby Mary Janes
Baby Kimono Wrap- Sew Mama Sew 
Family Member Magnets or some variation of this theme.


Well, that is a pretty extensive list. Who knows what I will actually make. Do you have any particular craft ambitions for 2011?

Wednesday, December 22, 2010

Last Minute Matryoshka Rattle Doll

It's a softie, rattle, taggie Matryoshka dolly! This dolly looks almost like I envisioned it. I have plans to revise the pattern a bit and do a full tutorial. In the meantime, I will share the creative process.

This is an idea I have been contemplating since I made these Matryoshka Valentines. (Hard to believe that was nearly two years ago now!) Those Valentines were inspired by the beautiful Matryoshka set that my inlaws bought us on their trip to Russia.

In other related news, I am going to be an aunt for the first time! Actually for the first time on both sides. Cliff's sister and my brother are both expecting their first daughters this spring. And, my cousin is also due at that same time. Three new baby girls within weeks of each other.

The first up, due in March is baby AJ. And, although my niece is not yet born, I felt a little something, something was in order this Christmas. Plus, I just got a new sewing machine! Try to hold me back!


The face was heavily inspired copied from this photo/blog that I discovered via flickr.  For the first time ever, I drafted my own pattern. I did use the Noah pattern from the Woman's Day Book of Soft Toys & Dolls for some guidance.

Here is an early prototype. It was cute, but the blue satin started to pull out and fray after turning. Plus, it kind of looked like a Virgin Mary Matryoshka.

So, I redrafted the pattern to be considerably larger and less religious. I also skipped satin and instead added a ribbon taggie for that smooth feel. For other texture I used a bit of velvet ribbon and a minky heart.


My "ah ha" idea was to use an empty hotel sample bottle filled with assorted beads etc... for a rattle.


To make it safer and totally washer friendly-I sealed the bottle well with Gorilla tape. Then I bore a hole in the stuffing and jammed it in so that it was pretty evenly surrounded by stuffing.

I used the lid of a cheap Gladware type container to stabilize the bottom.
I like how simple and sweet this is. However, I also have plans to do fancier versions. More to come!

In the meantime, Merry Christmas! I hope the spirit of the season is with you. I hope that you are warm and dry and with the ones you love.

I am linking up at Free Pretty Things today. Stop by to check it all out!


Monday, December 20, 2010

Tween Gift

I was so inspired this neighbor gift of Wordle decorated hot cocoa cans.  I switched it up a bit to fit my 5th grade volunteers.  Instead of cocoa I found these Dorito cans at the 99 Cents Only store.
I loved making this project. I especially loved the fact that I was able to give my tween volunteers a small fun gift and words of encouragement.

Saturday, December 18, 2010

Stash Bust Before A Move

So about a month before I moved my colleague from the kindergarten requested a play kitchen for her class. It just so happens that I had a curbside end table in waiting. How can I refuse the littlest kinders at Our Fair School?
Bonus motivation: Not having to move the curbside find!


From this:
To this- in the middle of packing!

Sometimes I make Cliff nuts.

I finished a week before the move. In fact, by the time I got to adding the curtain, I had packed up all my fabric. I ended up buying a $ store valance which was super easy and worked great.

While not my best work, this was the easiest kitchen to make by far. The bookshelf like design of this cabinet was perfect. I had everything on hand, so this was fast and cheap. I used two Ikea frames with plastic for the stove window. I ended up using shampoo caps for the knobs. Even the paint was the free Glidden paint from their last round of giveaways. 

The Universe must have appreciated my efforts because today right by my parked car was another little end table! Easy go easy come.

Thursday, December 16, 2010

2nd Annual Christmas Cookie Compromise


I always have the most grand of intentions when it comes to baking for the Crayons. I wanted to make these amazing melting snowmen cookies from Crazy Domestic.  The above pictures are the compromise. I am so dog tired; I am going to bed and leaving these snowmen with no scarves or arms.

This year though, I won't worry because Christmas is not about perfection and  learned that last year with the blind brownie reindeer.  

Monday, December 13, 2010

Parent Volunteer Gifts

HollyBloggyButton1


This year I am blessed with several parents who volunteer each week. Since this is pretty rare at my school, I want them to know just how appreciated they are. This Christmasy silhouette was my personal and budget friendly solution.

First, I edited a picture of my student in Picnik and changed the picture into a "pencil drawing."  Then I printed the picture out and taped it to the green paper with double sided tape. Next, I cut out the silhouette and used mounting tape to tape it to layers of scrapbook paper. A dollar store frame and it's ready for giving. So easy!


Sunday, December 12, 2010

Christmas Tour

 Since we just moved a month ago the Christmas Tour of Homes is a perfect opportunity to share my new apartment. Welcome!
Come on in! Smooch the one you love under the mistletoe!
Walk down the entry hall past my empty (boo hoo) laundry closet. I better get cracking with my Christmas cards so that everyone will have my new address.

Our freshly painted kitchen.
Be sure to have some wassail!

Low calorie apothecary jars.
A very simple mantel. I noticed that lots of us are feeling a simple vibe this year. The stockings are hung with care.
My dollar store star.


It wouldn't be a visit to my home without some sort of crafty mess in progress!

I hope you enjoyed the tour! 


Saturday, December 11, 2010

Welcome to 306

I finally have a pretty front door! After a good scrub and some embellishment that is. Who paints a front door with flat paint? Landlords that's who! Anyway,it's not poopy brown so I am happy!


This is my "make do or do without" door decor. With all the things we need for the new place, I decided no new Christmas decorations. At first I planned to use my ice skates, but they just looked really blah against the white. When I saw Pink Postcard's bike basket door decor, I knew just what to do.

Everything except the greens came from my stash.The greens were scattered cast offs at the tree lot down the street. (There are Christmas tree lots about two blocks away in both directions. It's so Christmas in the city over here. Love the neighborhood.)

The box thing got a fresh papering. Note to self:  learn to get bolder. All this stark white paint washes colors out.

My first aha moment was when I realized I could hot glue candy canes to chopsticks to give them some height.  My second aha moment was when I realized that I could tie the bow to a stick and stick it in there too. I only wish I had thought to hot glue the candy canes to real pine bough sticks. They would have blended in better.
Simple, cheap and cheery!

I am linking up (a day late and a dollar saved!) to Shabby Nest's Frugal Friday.


Tuesday, December 7, 2010

Picture Ledges


 It's late and dark, but I had to join in with the Shanty Sister's "Made it Without My Hubby" party.

I made two more PB knock off photo ledges.

 Whew it is dark! Maybe tomorrow I will have time to swap out these dimly lit pictures for something better.


Again the directions came from Ana White's amazing site of DIY woodworking plans. We have very little wall space for displaying art or photos in the new place. Too many closets and windows. What a happy problem! These simple ledges will make it easy and fun to enjoy all our little photos and tchotchkes. They fit this hallway space perfectly and just stick out a teeny bit past the doorway molding.


Right now they are decorated for Christmas. But, since we haven't figured out where we are going to store our pictures when not in rotation, I decided to play around and stage some other seasonal displays. Maybe a few good luck symbols  the New Year. Still love my framed engagement day calendar page.


Perhaps I will do something like this for our anniversary in July. Some wedding pictures, our invitation, and our cake topper salt and pepper shakers.

I still have a couple more ledges to make since Cliff has ordered up a set for his office.

Off to Shanty 2 Chic to check out the other projects!

Have a great Wednesday! 


Thursday, December 2, 2010

Looks Great- Less Filling

Last year I set up this little candy bar for my family. We loved it. I loved it. Probably too much. I should own stock in Trader Joes because of Candy Cane Joe Joes alone.
Anyway, this year I have been part of a walking club at work. I get to work by 6:30 to walk the "track" with my colleagues before school. I bet we are up to two miles a morning now. As early as it is, I do feel more energetic and prepared for the stresses of the day when we walk. Also, I got myself some fake Sketchers Shape Ups. (Mine are the LA Gear "Walk N Tones" and I got them for about $26 at Broadway Shoes.) They work! I definitely feel the "burn" after a good walk. At first I could only wear them for a few hours, but now I wear them all day and love them.

Needless to say, I don't want to sabotage all my walking efforts with an adorable, deliciously fun, hard to refuse candy bar in my very own home. So, this year I stocked my pretty jars with beads, ornaments and stale peppermints from last year. Eye candy, that's what you get at my home this year.

Christmas Craft Contest Sign


Nothing gets my creative juices going like a craft contest. This week's contest at Poppies at Play  is for signs or wreaths.

A few years ago I started having friends over for a little post Christmas celebration. I made a big pot of  wassail. It made our little apartment smell so good and inviting. Back in NJ wassail was a staple at the annual Christmas party, but none of my CA friends had ever heard of it. Everyone loved it. Our friend Chad declared the wassail to be "Christmas in a cup!" The name has stuck and now I get requests for "Christmas in a cup."

This sign kind of evolved as I went along. I had many larger designs, but when I unpacked a box of crafty bits and bobs and found this $ store plaque, I knew small and sweet was the way to go. I printed out the text and the cup image  (from a Google search) and simply transferred it to the wooden oval by tracing hard on the paper with a ball point pen. Then I painted in the indented letters and design with a teeny tiny brush and my Americana Craft Paints.


I used some crackle finish and some Antiquing Medium.

I toyed with a variety of ribbon hangers or wooden stands, but ended up taping a magnet to the back and calling it "good." Love that Gorilla Tape!

 It definitely looks homemade. (Alas, I didn't win a Silhouette Machine.) 

Still, I love it. It reminds me of good times with good friends. I can hardly wait for my friends to come over and see it.

In the meantime, my new sign can hang out on the fridge.
Be sure to head over to Poppies at Play to see all the other wreaths and signs. Happy Friday!