Wednesday, April 28, 2010

Ms. Carter's Retirement Party

1. I was crazy busy last week working on Mrs. Carter's retirement party. I loved the creative work, but the last minute date change and venue change stressed me out a bit.
Cookies in the Night
I baked cookies late into the night.
Dessert Table

But... this is the only picture of the finished product.
Doily Garland
The Crayons helped me make the doily garland. We added doily flowers to them as well. That really added a festive touch. Do you think I got a picture? Nope.

My students quilled a huge card that the entire school signed. Gotta shot of that? Not so much!

Somebody please remind me the next time I throw a party to assign someone to take pictures! Jeesh!

What I couldn't photograph if I tried was the warmth of this party. We had a lovely meal. Both adults and children spoke of Ms. Carter's influence on their lives. Our secretary sang. There was a power point slideshow of "vintage" photos...to the Tom Jones song, "She's A Lady."

Thirty-Two years working as a Special Education Aide and her enthusiasm never waned. I mean it too. This lady had a smile for everyone. Every. Single. Day. Her impact on the future is truly immeasurable. We should all be so lucky to leave such a legacy.

Monday, April 26, 2010

From the Archives- Trash to Treasure Purse Revamp

I am in the midst of a *very* busy season coupled with an allergy attack. So, I thought, how about one from the archives.
Paris Swap Bag
This purse was one of my very favorite trash to treasure projects. It was made for a Paris themed swap and originally posted in May of 2008.. Hope you enjoy!


Thrifted Purse Trash to Treasure
I don't have cable so my HGTV viewing is pretty limited to hotels and my parents house. Still, I do love me some H&G. I have fond memories of one show in particular where they try to recreate a designer room on a budget. It was Sensible Chic and every show starts with an "inspiration room."

Well, welcome to Sensible Chic -The Purse Challenge Edition

While in Santa Fe, I had the Springtime In Paris Swap on my mind. For one thing, our hotel had a sweet French cafe and so did every other corner. Pâtisserie reminds me of Paris in the spring or really, any other season.

In one fancy French shop I spotted this Vera Bradley bag:We'll call this the "inspiration bag."

Now, Vera Bradley bags took up a whole wall of the fancy French shop and frankly, the prints on most of her bags heavily resemble many of the French provincial linens in the store.

See for yourself: French Provincial Linens VS Vera Bradley Fabric Collection.

Turns out Vera Bradley is a company from Fort Wayne, Indiana. Très Américain!

Anyway, while studying this bag I noticed that it's construction wasn't too challenging. I made a mental note to keep an eye out in thrift stores for a basket like bag. Maybe for the swap project?

In California we call making mental notes "manifesting." It's about sending our intentions out to the universe.

Well, like clockwork I manifested a potential bag at GoodWill Santa Fe.

Groovy Plastic Canvas Embroidered Bag

The first step was to cut off dear someone's Aunt's embroidered handiwork. Credit where credit is due, those were some beautifully even stitches. Also, adhered like nails to the basket.

Thankfully I remembered a Pampered Chef demonstration where the kitchen shears had cut a penny. Even with the wonder scissors it took a lot of effort to cut this band of iron clad embroidery.

Gross plastic 
lining
Inside was a seriously gross and dirty shower curtain type lining.

Bag Disembodied

Free at last!

Getting the old, discolored hot glue out of the basket weave was another story. I felt like a dentist and the patient had a serious tarter problem.

Another challenge was deciding weather or not to save the grody lining. (I haven't said "grody" since 8th grade, but when a word fits, use it.) I wanted to toss it quick, but it did make a perfect pattern for the new clean, crisp light blue cotton lining.

Paris Swap Bag

I had planned on looking around for some provincial style napkins or something to Frenchify the bag a bit more, but then I opted to just use some stuff from my stash.

I machine quilted the black and white print on the diagonal. Although the inspiration bag also has quilting, I did this to give it a "Chanel feel." It's a subtle nod to real French design.

Paris Swap Bag

In the end, inspiration bag $57 "Sensible Chic" bag $3. Quelle affaire !

Check out more Trash to Treasure with Reinvented!

Friday, April 16, 2010

WIP: Doily Garland

Dying Doiles

Updated:
Tried dying with food color...messy! Switched to painting with kids water color set. Ah! Much better.

Wednesday, April 14, 2010

WIP: Road Trip Bag- Help Me Out Ladies!

Last Christmas I got the book Stitched In Time by Alicia Paulson.  I *love* this book. Really and truly. I could move into this book. It's so sweet, and cozy and sentimental.
IMG_2517
The Road Trip bag captured my imagination right away. I love how the floral lining peeks out. I love the simple leather straps. I love it all. My mom and my aunt make an annual pilgrimage to the famed Round Top Antiques and Flea Market in Texas and I just knew my aunt would love a Texas road trip bag. I mean what Texan doesn't love to flaunt their state?

To add my own flair, I lovingly created a tablecloth inspired map of Texas and embroidered it. Then I sewed it into the dimensions of the bag as directed by the pattern. My pathetic spacial skills did not alert me along the way, so I was quite surprised to discover what a narrow little bag this is.
Road Trip Bag take one

Oh, sure the book completely tells the finished dimensions of 10 1/2" X 15 3/4".
The picture shows the magazine sticking out with just a bit of space on the side.
And really, how big can a bag with such sweet leather straps really be?

But, all those clues meant nothing to me until I went to sew the lining in and felt how narrow it was. I imagined trying to dig out sunglasses or a ringing cell phone at the bottom when it's such a tight fit. It's certainly not a rummage through bag.

I'm so sad to say it feels wrong to me. I know bags are such a personal thing. I guess I just tend to like a roomier bag being a pack rat and all. So, I am back to the drawing board.

I have thought of two remedies...let me know what you think.

Choice A: Take out the side seam on the canvas part and add side gusset. This would make the top roomier without having to redo the whole thing.

Choice B:  Cut out the Texas and make it into a patch on another bag altogether. I don't have enough canvas to remake the bag as is. I could fringe the edges of the patch. It could be cute.


In the meantime, here is an awesome take on the road trip bag (also modified to another size) on flickr.

Monday, April 12, 2010

WIP- Citra Solv- And Embroidery

Citra-Solv Transfer

Transferring embroidery patterns to fabric is a kill joy for me. The lines always seem fuzzy and it's time consuming too. For a while now I have been thinking that Citra-Solv transfer might just be an easy way to print an embroidery pattern on fabric.

Citra-Solv Transfer and Embroidery

This weekend, I put that idea to work. It works great! This is a heavy canvas and the transfer was terrific. I was able to embroider over each part without a problem.
Road Trip Bag Emboidery

I was going for a vintage table cloth map type of feel here. I first printed out a map of  Texas from Enchanted Learning. Then I used a Google image search to find an armadillo, BU logo, flowers and the Alamo. Once I re-sized those images in a Word Document, I cut them out and glued them to the Texas map. Then I scanned the whole thing and inverted the image (mirror function) so that when I did the Citra-Solv transfer the writing would be correct. I know that seems like a lot of work, but creating just the image I wanted was half the fun.

If you click on the picture you will see that I didn't embroider over the city names and the finer details of the Alamo. I really like the mix of embroidery and printing.

 PS- That is my first bottle of Citra-Solve! For all the cleaning, paint brush washing and crafting I have done- the stuff lasts!

PPS- Oh, and I expect at least one "Go Bears!" in the comments!

Sunday, April 11, 2010

Martha's Sewing Encyclopedia: Bib Pattern & Book Report

My mother-in-law used to give handmade baby bibs as a new baby gift. She bought them at a certain craft fair for years, but now this particular seller is no longer there. For a while now, she has been trying to persuade me to make and sell bibs.
 Cupcake Bib
I have no interest in making anything to sell, really. For one thing, my full time job keeps me plenty busy. Also, I have rights at work that sometimes I ignore all together at home. For example, I get a state mandated 20 minute break everyday. Whilst crafting, I often work for hours without a break!

Cherries Bib
Anyway, my mother-in-law is incredibly good to me, so I decided to surprise her with a trio of bibs that she can gift at any of the dozens of showers she goes to.
Dog  Bib
It was my first project from my new Martha Stewart Encyclopedia of  Sewing and Fabric Crafts.


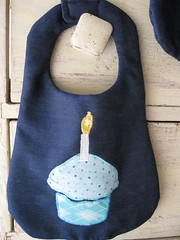
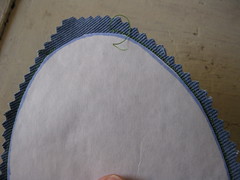
This bib is from the Oilcloth Bib pattern in the book. It has an additional crumb catcher pocket- which would be awesome if I had oilcloth. I printed out the pattern from the enclosed CD. (The shape of the bib is the same as 
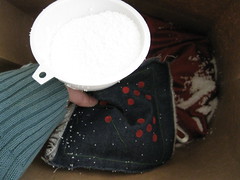
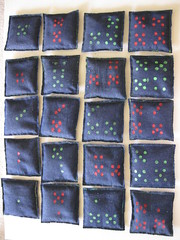
this pattern from her website.) I used lightweight denim and quilt batting from my stash. The bibs my mother-in-law used to buy were gingham, but I am a denim gal and I am also Stash Busting this month. It's not as sweet as pastel gingham, but maybe it's more forgiving of stains?

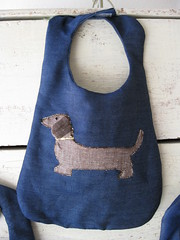
The pattern calls for snaps, but I have only Velcro in my stash, so Velcro it was! I used an Ellison Press cutout from school as the pattern for the cupcake, a Google image for the dog, and I free handed the cherries.

Over all, a very easy pattern to make. The first bib took about a bit longer but the rest took maybe 20 minutes or one episode of  Modern Family on Hulu.
Trio of Bibs
Now for the book report...
I read the Martha Encyclopedia of  Sewing Crafts. It is a really great book...with some limitations.

The Pros:
Photography- This book is detailed and gorgeous. Lots of pictures illustrate the tiny details of sewing. I hope to study the pictures to help my own photography skills.
Tutorials- Martha is the master! There are very detailed and well written insturctions.
Background info- This is truly a sewing encyclopedia with glossaries and resource pages galore.
The enclosed CD makes printing out patters very easy. The enlargement is done for you! The patterns on the website require you to enlarge them. Not a big deal, just more time consuming.
Inspirational- there are some techniques covered that I would like to try-such as dying fabric.

Cons:
-Most of the projects (or something very similar) are on her website already. 
-Many more projects are inspired by bloggers who I have been reading for years. For example, stuffed animals from felted sweaters- hello Betz White!
- Martha is a business woman- this book is not about using what you have! I have a list of craft supplies as long as my arm that this book makes me want to buy!

This would be the perfect book for a beginning sewer because it really will "grow" with you.  I like the informational sections more than the patterns and tutorials. Tutorials are available on the web a plenty. What Martha does is give detailed instructions on the "right way" to do something. She really does educate the reader about fabric choices, tools, stitches etc. This really is a full text of everything from curtains, to blankets, gifts and quilts. I would never want to choose only one craft book, but you could have just this book and sew for the rest of your life. It is very complete. Makes me want to get the other Crafts encyclopedia too.

Wednesday, April 7, 2010

Stash Buster Birthday Gift

Moss Monogram


"Never sacrifice what you want most for what you want right now."

This is a quote from this blog post by Frugal Babe.  I so wish I had this tattooed on my hand about 20 years ago. Anyway, her post is great and it's been resonating with me often lately. This quote is one of the reasons I jumped at the chance to take part in Dollar Store Craft's April Stash Busting Challenge. This quote and the challenge kept me on track when I wanted to go buy "just one more thing" so I could make my mother in law a Juice Glass Cloche. Not that the $1 juice glass would break my bank, but it's more the principal that I have enough. 

So, I stretched my imagination and scoured a bunch of crafty decor blogs and came up with a plan B.

Just for fun, tell your husbands that you are going to give their mother a moss covered monogram.

Cliff  just couldn't "get it." I showed him pictures of other moss covered monograms and he thought it was hilarious that we ladies thought moss was for decor. "What does moss have to do with letters?"

I told him that I was going to put it on my blog and that you all would back me up.

"Oh your critical readers! You get sooo many harsh comments there. When has anybody ever said they didn't like something on your blog?"  Good point. Thank you readers!

I went ahead and made it anyway...
Supplies for Moss Monogram
Framed Moss Covered Monogram

Supplies I Used:
cardboard
small picture frame 
pretty paper
hot glue
moss
left over knob thing
paint for your frame
stain
green paint for the initial
scissors
decorative knob and hardware for it
ribbon scrap

Step 1- I painted the frame. I used heirloom white and then before it was dry enough I tried sanding it and giving it a once over with some stain I had on hand. The stain ate through the paint and cause it all to smear together. It was a mess and I was panicked. Fortunately, the end result was OK. Not the easy peasy distressing that those Shanty 2 Chic girls always do, but OK.

Step 2. Meanwhile I drew the Z  on some scrap cardboard. I also traced a small butterfly onto some pretty gold paper.

Step  3. I painted it with green craft paint to make sure the cardboard didn't show through.

Step 4. Next I glued gobs of moss onto the initial covering it well.

Step 5. I actually found the pretty paper in an old book I bought to cut up. I glued mine right on top of the glass.

Step 6. I trimmed the moss with kitchen scissors and added a bit more to cover some thin spots.

Step 7. Then I cut the cardboard scraps into small squares and glued them on the back of the initial.This made it pop off the background a bit.

Step 8- I used a knob thing I had so I needed to drill and screw it into the frame.

Step 9. Assemble paper and glass into frame and hot glue initial onto the frame. Add butterfly and a bow and hang!

Moss Monogram

Oh, and now Cliff likes the finished project, or at least he says he does.


Tuesday, April 6, 2010

Some Easter Treats for Me

A Few Easter Scenes

I am bummed because I dug into my Easter Egg Swap package with such abandon that the tags are all messed up and I can no longer give proper respects. The eggs were amazing and I quickly added them to my display shelf, coffee table and just about any other surface there was. Also pictured here are the darling chick salt and pepper shakers from my Christmas stocking. Thanks Santa!


My Easter
I enjoyed a lovely (although cold) Easter. I went to both church services at HUMC and they both really rocked my socks. Our pastor can preach! The music was great! I also volunteered at the welcome table which was really fun. It was so great to meet new people and just feel the love that is HUMC.

The rest of the afternoon was quiet...until the earthquake and actually, that was pretty quiet too. Later in the evening we went to see Nellie McKay in Echo Park and she was fantastic.

And, the Easter goodness has continued on...

My mother-in-law sent me these adorable and delish chocolate tools. There was a wrench too, but that didn't even make the picture. Yum! They were from Andy's Candies which brings back tons of memories for me.
Chocolate Tools

Then I got a big box from Amazon in the mail. It contained the Martha Stewart Encyclopedia of Sewing and Fabric Crafts. At first I missed the gift tag and thought that I had won Junie Moon's giveaway (I didn't because it's still going on. Go on over and enter- especially since I am out of the contest!) Nope, my mama sent this to me. She had signed up for some promotion with Amazon that gave free shipping for a month and wanted to order something big while the getting was good. Man! It's an awesome book! Martha really does know everything. In the back there is this CD with all the patterns to print out at home. Can't wait to dig in this weekend.  Thanks Mama!


Finally, I leave you with this Nellie McKay Dog Song.

Have a great day!

Monday, April 5, 2010

Craft Hope Bean Bags

Craft Hope Bean Bags
Well, I finished my bean bags for Craft Hope's Liberian Orphan Education Project.


My pledge to not buy any craft supplies in April almost came to a quick end on April 1. I signed up to make the beanbags and thought I would use actual beans, but on further inspection, the directions call for plastic pellets or other non-food filler due to customs regulations. Makes perfect sense. And, since this is for a good cause I was going to bend the no buying stuff rule just a bit. Then I priced plastic filler online. It's not cheap, but I am.

Hmmmm... what to do? Ah ha! That squishy pillow I bought on a whim about six years ago when those squishy pillows were all the rage...adios amigo! I never did like that pillow much, but I have held on to it anyway, pack rat that I am.
Bean Bag Filler
I very eagerly cut into the pillow to stuff my bean bags. The squishy pillow is made of about a bajillion trillion teeny tiny Styrofoam bits. It was seriously like the attack of the styrofoam nonpareils! All over my hands, face, sewing machine, everywhere! I put it in a large paper bag and worked from there.

I used a funnel to fill the bean bags and just said a small prayer of gratitude for my excellent vacuum cleaner.
Craft Hope Bean Bag Backs
Although it was messy, these styrofoam nonpareils were awesome to work with. My sewing machine could sew over/around them and closing the bags was pretty easy. They did cling to everything, but they also vacuumed up easily. I had more than enough for 20 number bean bags, a set of shape bean bags and one large pillow for future crafting.
Craft Hope: Shapes Bean Bags
To make the shapes, I first printed out shapes from a basic Word document using "autoshapes."
 Tracing shapes
Then I traced this onto freezer paper and cut them out. I ironed the freezer paper to the fabric and sewed right around the edge. Then I trimmed everything with my pinking shears.
Sewing Around Freezer Paper
It worked like a charm and my shape bean bags are all recognizable!

I used freezer paper stencils and craft paint with a fabric medium added to make the numbers and the dots.  I just labeled the shapes with a Sharpie marker. I am not sure if  English was the best way to go, but the samples from the teacher store all had them labeled.

It felt great to have used up some fabric, re-purposed a pillow and done a little good too. I am so thankful for the ladies at Craft Hope who give us fun and easy ways to help others!

I am linking this to the DIY Day at ASPTL.


DIY Day @ ASPTL

Juice Glass Mini Cloche


Juice Glass Cloche
I can't remember where I saw the first homemade cloche, but it went to the top of my "to do" list. I scoured thrift stores for a cheese plate I could use. Nothing. I looked at every bowl and vase for the right proportions. I wanted a rounded shape with a little bottom-to-be-top. Finally, about a year later, at the 99 Cents Only store,  I spotted an adorable rounded juice glass with a tiny bottom. A mini cloche it would be.

Napkin Ring Nest
To give you an idea of the scale, the base is an old coaster.

It took me a while to decide what to put inside the cloche. Then I remembered the grape vine wreath napkin rings my mom sent me when she was de-cluttering her own stash. The knob is from my mom's friend who de-cluttered her house by sending me a bag of those knobs. (Ahh! I love being the recipient of all this cool stuff.) I spray painted and Gorilla glued the knob to the bottom of the juice glass. Easy peasy!

 Anyway, I added some shredded textbook, moss and a few clay eggs. The tag uses this terrific image from the Graphics Fairy. I couldn't believe how nice this image printed out even at a fraction of the original size.

I think it came out swell and I am jonesing to go back to the 99 Cents Only store and get a few more glasses! I won't - I promise! Nevertheless, I have more wreath napkin rings, knobs, paint, glue, moss and ribbon. And with friends and family like mine, it's gonna be a while before this stash is busted! May 1st- those juice glasses are mine!

I am linking this to Brag Monday at the Graphics Fairy.

and


DIY Day @ ASPTL

 DIY Day.

Hope you are having a great week!

Saturday, April 3, 2010

Happy Easter!

 Faux Chocolate Rabbit
"The great gift of Easter is hope - Christian hope which makes us have that confidence in God, in his ultimate triumph, and in his goodness and love, which nothing can shake."
-- Basil C. Hume

Swap Eggs

Shara from Monkey Box held an Easter Egg Swap this year and I was very "eggcited" to participate.

This is a sampling of my swap eggs. You can click on any picture to see them larger.

Quilled Eggs

I bought the string wrapped eggs at Giant Dollar. I loved the texture and knew they would be perfect for quilling!
Quilled chick Eggs
Most of the designs came from Alli's book Paper Quilling for the First Time, but I did branch out and try my hand at some of my own designs.
Quilled Rabbit Eggs


Quilled Butterfly Eggs

On Monday I will share all the amazing eggs I recieved in the swap. Hope you have a wonderful Easter!

I am linking this post to Tatertots and Jello's Weekend Wrap Up. There are always lots of great ideas over there!

Thursday, April 1, 2010

I Get By WIth Help from the Web- Retirement Party Decor

I was very excited to be asked to provide decorations for one of my aide's retirement party. Mrs. C worked as an aide at our school for about 30 years. She is beloved, beloved, beloved. As much as we would have liked to throw her a party at the swankiest place in town, we knew that to really honor Mrs. C we needed to celebrate at school where everyone could be included.So I am in charge of making our school library look extra special for this wonderful lady.

After reading dozens of party blogs for years I have found that most focus goes to birthdays and showers. The retirement party is all but forgotten. I guess most people do not celebrate at home.

I had many ideas for pretty decor. I have wanted to make cake plates like these for years! They were made by Leanne at Organize and Decorate Everything. Still, I was scratching my head for some cohesive idea. Not a "theme" exactly, but a design focus.

Then, like magic the power of the blogging/web community has lead me to a perfect plan- and on a dime!

Fist I saw this amazing doily garland made by Laura Ingalls Gunn on Decor to Adore. Laura used food coloring to dye the doilies. Our library has floor to ceiling bookshelves. These would be easy to make and easy to hang! In fact, I think I can have the kids at Craft Club help make the garland. It would be nice for the kids to have a hand in the decorations anyway!

Later I saw a cake store that had eyelet style cake wrappers. They were gorgeous, but cost about $1 each and that would blow my budget in no time flat. I wasn't worried though because I just knew that someone out there in blogland had blown to cover off of high priced goodies with a tutorial! And, I was right! A quick search for "cupcake wrapper template" lead me right to this sweet picture!

This comes from Alamo Sweets via Cake Central. Not only do they have an awesome idea for doily cake wrappers, they make some gorgeous cakes! Check out this cute cupcake display idea. I may have to copy that too!

Now I have a theme design focus!  So, I cleverly rushed to the stores on the 31st to beat prepare for my April moratorium on purchasing craft supplies.

As luck would have it, I didn't find a single plate that I wanted at the thrift. No worries, I have a bunch of lids from the tins I used to make the PB Inspired Snack Tower.  What inspired me to use the tin lids? Little Brown House's Dollar Store Cake Stand made out of burner covers. That's what!

This post is starting to remind me of the book- If You Give a Mouse A Cookie. Or maybe the Song That Never Ends? If you give a blogger an idea...it just never ends! I am so thankful for all the creative geniuses out there who share so much! You really do bless me!

What's inspiring you lately? What are you up to? If you have any great links, please share them in the comments!

Craft Hope - Bean Bags

Bean Bags


I'm busting stash for a good cause today. Maybe you'd like to join me? Check out Craft Hope's latest project here.