Tuesday, November 30, 2010

Pipe Dream Before & After

Kitchen Chimny  
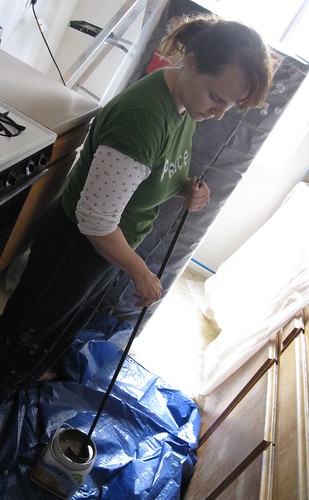
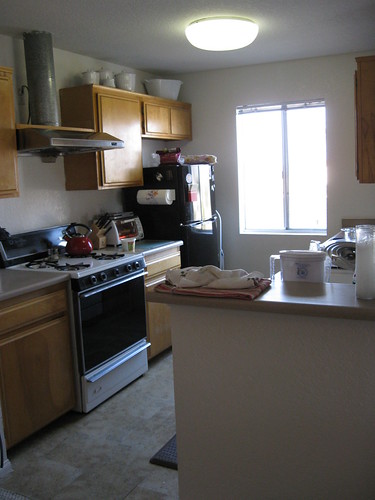
Thanks for all the kitchen kindness! It's been really rewarding reading the comments. Since you know, the cupboards aren't exactly speaking up to say thanks. And they really should! It was a huge job! But the one who owes me big time is Mr. Lincoln- the bizarre stove pipe. He was a hot mess.


Before:  The Challenges
1. Big metal stove pipe that makes me think of Ma Ingles or Abe Lincoln.

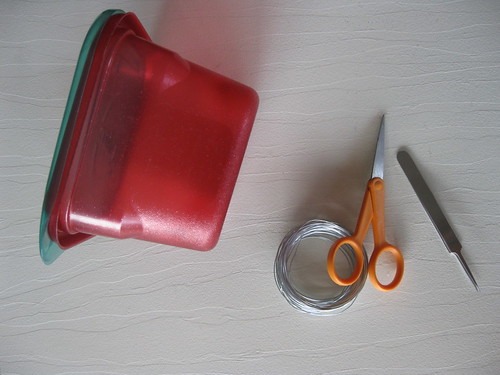
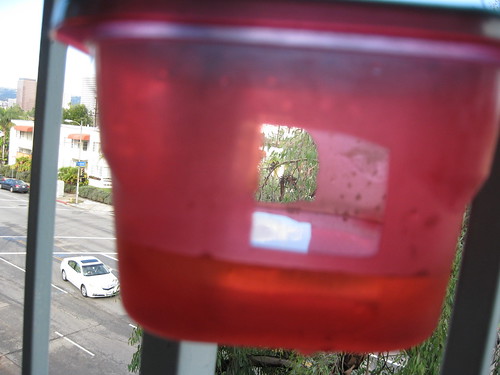
2. Does anyone know what the weird plastic cups hanging off my range hood were for? I have this fear that they are grease catchers or something and one day I am going to regret taking them off. Seriously.

3.Duct tape. I love duct tape. I even used Gorilla brand duct tape on my headboard. Still, duct tape is like a good bra, it needs to work behind the scenes. I don't know the root problem, but I am going to trust that the duct tape is doing it's job and leave it alone.

IMG_2927 
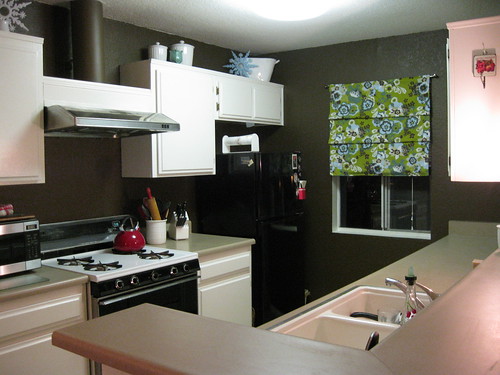
Middle: It's already looking better.
Chimney Cupboard 
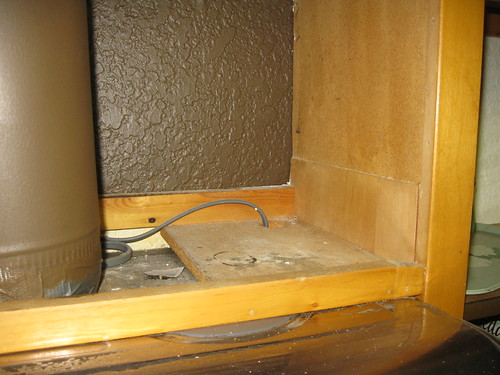
While painting up here I noticed that it looked like there may have been a cupboard up here to conceal the pipe. Perhaps it was cut out to fix the pipe or something.  Or maybe the cupboard was destroyed to make room for the pipe. I find it kind of creepy.

Getting Better: Can you see what I did?
IMG_2948

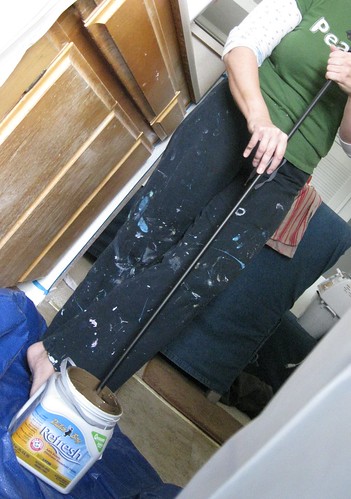
I went and got a $3 piece of molding from Home Depot. I had them cut it to the exact measurement. The cupboard wasn't cut evenly so it turned out to be such a tight fit I didn't even need to screw or glue it in place. I used some wood filler to fill in the gaps and cracks and painted it up.

Now for the fun stuff. That spot right above the stove is the only wall space to decorate in the whole kitchen. I had several choices for art, but couldn't choose just one. Ana White $10 Ledge to the rescue!

Now I can change out pictures, salt and pepper shakers and so on. The folks at Home Depot cut the wood for me, then all I did was screw it together, paint and screw it into the wall. Truly a very easy project. I have the wood in my trunk to make three more this weekend.

Ah, so much better!

Future plan: Spray paint the top "control panel" where the clock an and timer are. It will have to wait until summer, but the scratches (mostly concealed by my teapot) are bringing down my high rent makeover!

Just one more kitchen post tomorrow and then I'll let it rest. Promise.


 I am linking this up to the January Before and After Party at Thrifty Decor Chick because it still is my favorite "before and after" in the new place!

Monday, November 29, 2010

Let's Talk About Dutch Boy Refresh Paint

Way back when I painted this coffee table the people who represent Dutch Boy Paint contacted me and asked me if I would be interested in reviewing the Refresh line. Sure. The only problem is that at my other apartment I couldn't paint. I had a big plan to give the paint to my friend who just bought a condo. I'm so proud of her and all of her achievements. She is a remarkable person and I would love to help her paint. Of course, the you know what happens to the best laid plans. Life is just so daily! Whew!

Anyway, who knew I would soon be in a new place where I could paint?!

Paint I did. Like I said yesterday the brown and white scheme was inspired by my favorite striped shirt. I loved the "Beach House Brown" when I painted Michelle's coffee table and knew pretty much from the first moment I saw that kitchen I wanted to go with that color.

Here's the funny thing, it's not on the Dutch Boy web site at all.  Orchard Supply Hardware (OSH) has it as part of their "California Collection." Maybe it's a special deal with OSH?

Enough about colors. All paint comes in colors!

Moving on to the really important thing: No VOC! The Refresh line has all sorts of features that make it "green." This is important to me because Cliff suffers from migraines and they had been especially bad right after the move. We suspect it may have been that the whole place was just freshly painted. I was a bit concerned to start painting, but the smell didn't bother him at all. Frankly, I couldn't smell anything. You can read more about the environmental advantages of Refresh here.

Now, I have to be honest. I am not all that brand loyal. Oh sure, I prefer Crest and Tide, but if Colgate or Era are on sale...well, I'll cross that aisle to save a nickle. There is a reason however, that I will be loyal to Dutch Boy and it's not the paint. It's the can!
 

I am pretty sure a woman designed this can because it is so smart. First off it's recyclable, light weight plastic. It has a built in handle similar to a gallon of milk. No more skinny wire handle cutting into your hand.
Let the Painting Begin! 
  It has a pour spout! Thank you!  It's so much neater than a regular can. And the last feature that I love about the can is that it has a screw on lid. Again, thank you! I ended up using leftover paint for the cupboards and by the end of the week that pry off/ hammer on lid was a gunky, inefficient and annoying mess. Painting is enough of a chore without adding the can mess to the whole ordeal. The Dutch Boy can? Jug? It is the best!
IMG_2945
Now, on to coverage. I was painting dark chocolate brown over stark white. I thought for sure it would take primer and a couple of coats to get an even finish. My father in law once painted my sister-in-law's dining room 5 times to get a deep red finish. And that was with tinted primer first. With that in mind, I was a bit nervous. Also, I have that rough "knock down" finish on the walls.

I used that satin finish and the paint went on like a dream. It was smooth and very easy to get even coverage. The guy at OSH told me I could skip primer. I did two coats of Refresh and it is flawless.
IMG_2952

I used a paint brush to cut in sometimes. I used this really cool edge tool with little wheels to scoot along the edge of the ceiling, and I also used a roller. With each tool I was able to get a nice even coverage even on the goofy Little House on the Prairie chimney.
IMG_2957
My kitchen isn't huge and has a good amount of cupboards, so I used about 1/4 gallon. Most likely I could have bought the tester size, but like I said, I was sure I would need to do three or more coats. Clean up was easy. Really, I have nothing but good things to say about Refresh Paint. Way to go Dutch Boy!

Now when I finally get around to helping Michelle paint her condo with her Dutch Boy Refresh paint, I will be a real painting pro and Dutch Boy will get two reviews-everybody wins!

Saturday, November 27, 2010

Can This Shirt Be A Room? The Painted Kitchen

Remember that great feature from the old Domino magazine?
 IMG_2963 
Well this favorite shirt was this inspiration for my kitchen makeover.

Here is a before shot: It's a little cold and disjointed looking.
new apartment 006

Here is half way: Already the cupboards look better. I used Dutch Boy Refresh Paint in "Beach House Brown."
IMG_2927

 Painting the "Little House on the Prarie" pipe was Cliff's suggestion-best idea ever!
Painting the Kitchen
Here I am mixing paint with an old curtain rod. You can see here how damaged the cupboards really were. Fortunately, I had no idea how much work it is to paint cupboards or I wouldn't have done it. The paint for the cupboards was white semi gloss left over from the professional painting the kitchen had before we moved in.

(Drum roll please.) The Reveal:
IMG_2945
More pictures and more details to come tomorrow!

Friday, November 26, 2010

My New Sewing Machine

Crafting Nook Open
Last Black Friday I saw the sewing machine sales at Joanne's and really wanted to upgrade. I had just paid $80 for a cleaning and servicing of my old machine and didn't feel that I could turn around and get a new one pretty much the next day. So, I decided that if I was still wanting a new machine on Black Friday the next year, I would treat myself no matter what.

I don't like to be oversold. If what I need works, I stick with it. I was using this portable black and white TV (happily!) until TV went digital and so any color TV is awesome. (And, I must say, I Love Lucy looked just as good on the old retro set.) However, lately my sewing skills were surpassing my sewing machine's capabilities.

The ladies at Joanne's were very nice when I had to turn down the $279 Viking Machine in favor of a more reasonably sale priced Singer Curvy.

I have no doubt that the Vikings are better and a terrific value etc... but the  Curvy has attachments like a ruffle foot and a walking foot (sold separately) and will be a major step up for me anyway.


The old TV set was recently dropped off at Goodwill for recycling and the sewing machine might go to school for craft club.

It's a new day for this stick in the mud!

Monday, November 22, 2010

DIY Hummingbird Feeder

This isn't a typical almost Christmas project, but it does involve the Christmas variety of the Zip Lock storage containers.
The "Hummingbird Tree" Outside My 3rd Floor Apartment
One of the many things that delights me about our new apartment is the "birds eye view" of this tree which is brimming with hummingbirds. On Sunday I think I counted 5 or 6 zooming about around one single remaining red blossom. Not wanting the birds to disappear I looked up "DIY Humming Bird Feeders" and found this video which uses a red solo cup.  I didn't have red solo cups but, I did have a leftover red Christmas Zip Lock storage container. I also used some wire from the dollar store.

Supplies for the Homemade Hummingbird Feeder 
The pictures are pretty much tutorial enough.

Homemade Hummingbird Feeder

DIY Hummingbird Feeder: Holes & Sugar Water Up Close

The formula is 1 part sugar dissolved in 3 parts warm water. That's it. No food coloring. Apparently the feeder will need freshening up about once a week or so. So far, I haven't had any visitors. It's been terribly windy and cold. I was over to my neighbor's apartment (I actually have a long time friend within walking distance! Yay!) and we saw several hummingbirds swarming in her bottle brush bush.

I'll be sure to add pictures once I catch one feeding!

Saturday, November 20, 2010

Sunday Is Here

Hello Old Friends,

I think I am finally back. 

During lent my pastor gave a sermon during which she said, "Today is Friday, but Sunday is coming!" This summer was one long Friday. Personally, professionally, amongst my dearest friends, and in my family there was a lot of pain. Usually I roll with the punches pretty well, but this was different. So much so, it killed my creativity- and my favorite source of stress relief. Thus no blogging.

But...today is Sunday!

11 For I know the plans I have for you,” declares the LORD, “plans to prosper you and not to harm you, plans to give you hope and a future.    - Jeremiah 29:11

For the past few years I have been working *very* hard to be completely honest with myself about "wants" and "needs."  I really, really, really wanted a house with a garage so that I could peruse my interest in woodworking more. The balcony workshop was great and all, but a bit limiting. I really, really wanted my own house so I could have a washing machine that didn't need half a dozen quarters!And, more than anything I wanted a change. I just felt stuck.


On the very darkest of all days, the Lord set in motion a move for us. And move we did!

Friends of ours from church where also in need of a change and long story short, they moved to Texas and we moved into their *AWESOME* apartment! 

No, it's not the house I wanted, perhaps it's better.  God's plan was better than mine.

I am taking nearly a month of furlough days this year. That ends up being nearly a ten percent pay cut. I am super thankful not to have a mortgage that's a stretch right now.

We have only been in the apartment for 1 week, but here is my list of things I love already:

10. High ceilings! 
9. Lots of windows! I had no idea I had spent the last seven years living in the dark.
8. Laundry hook up! (We don't have a washer yet- any front loader, stack-able recommendations?)
7. A tree full of humming birds right outside my window.
6. A courtyard full of plants.
5. Quiet, adult neighbors.
    (No late night parties on the roof top pool deck also known as my former bedroom ceiling.)
4. I can paint the walls! More on that to come. I haven't wasted a second.
3. Storage! We have a garage storage unit- and side by side garage parking.
2. It's close to my school! A world away, but only 2.5 miles. My commute is only 7 minutes.

And the number 1 favorite thing:


A craft closet! We have seven closets! ( I know! Unbelievable! ) Seriously, Cliff and I walk around all day saying things like, "This is a miracle. I just can't believe WE actually get to live Here!!"


It feels so great to have a place for everything. It's truly a fresh start. The one I really did need.

Needless to say my creative juices are flowing! See you again real soon!