Hello again!
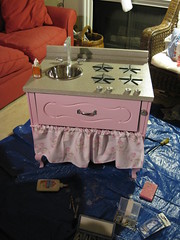
I am now about 90% done with my play kitchen. Yesterday I finally sprayed the countertops with the Rust-oleum Stone Spray paint and this afternoon I gave them a few coats of varnish. Then I was finally able to assembly everything for good this evening. I still want to add a magnetic chalkboard to the side and to touch up the back which had all those holes. I am sure just one more hour and I will be done.
A few notes:
First up, my counter top was too thin to just screw the knobs in. So, I used bolts and washers like this.
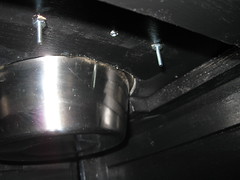
You can see here how I used extra bolts to hold the handles up and parallel to the counter.
To hold the faucet on I used both one screw and some Gorilla Glue.
I used four screws, one in each corner to reattach the back board. Much easier than nails or staple gun.
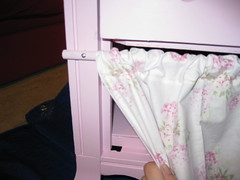
The curtian rod is screwed in to the frame. That way it can be unscrewed by an adult to launder the curtain.
The chopsticks worked out great for the gas burners. I was able to cut them with my Pampered Chef Kitchen Scissors! Then I gave them a quick sanding and painting. I glued them on with Elmers Wood Glue.
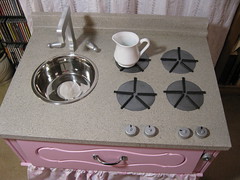
I used Sharpie Marker to make markings one the knobs. Once again I used diet Coke plastic bottle caps with a quick coat of silver spray paint. This cabinet was so deep. I kinda wish I had a bigger sink.
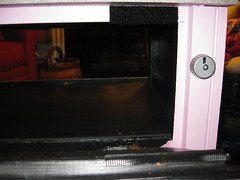
I found adhesive velcro squares at the dollar store. They were perfect to hold the oven door closed!
So, how are you doing?
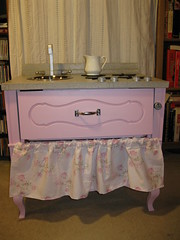
I am going to call this one the "Shabby Chic Play Kitchen."
I am dying to see pictures of your completed kitchens! Stay motivated! You can do it!
Next week, I will break down my costs and update my supply lists. I'd love to hear about and see your adaptations too. Is anyone ready to share?
7 comments:
so cool - love it :D
I'm far from being ready!!
In order for my paint to dry evenly (not dripping down like the first coat) I need to put it on each side, 3-4 days at a time for the paint to dry completely. So in 3 days I'll be able to paint the front, and in 6 days I'll be able to paint the counter top. I'll then need to screw everything in place and fill the fridge with the ton of playfood I did! oh, and sew a curtain, too
That pink shabby chick kitchen is really lovely!
I'm almost ready to show some pics of my kitchen. I even added a few extras...
xoxo ~Lisa
I am completely in love with it. What a beautiful little kitchen set.
Ruth
So cute. I totally should have done this for Christmas. She's getting one from Target from her nonnie though.
We were about to purchase a plastic kitchen from Toys R Us, then I saw this!!! I absolutely LOVE your idea and am in the process of gathering my materials! Thank you for sharing your art and creating this fabulous tutorial.
Amanda
I LOVE your ideas! So cute, and yes, very "shabby chic."
Post a Comment