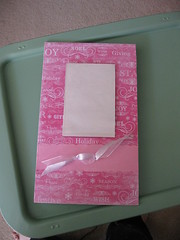
This is my completed frame with my cute hubby modeling. Since I knew I wanted to make a bunch of these frames I bought a scrapbook paper book on sale after Christmas.

Supplies
plywood scrap
Modge Podge
ribbon
magnetic or velcro acrylic picture frame
(I got mine at the $ store, but I am sure you can get them many places.)
picture hanger thingy
hot glue gun/sticks
drill (optional)
How To:
1. Sand the plywood. I also primed mine because I had a can of primer out already. I think this is probably optional. Also, I want to mention that you can get a small sheet of plywood at Lowes or Home Depot and they will cut it to size for you. Thin plywood is pretty cheap too.
3. Trace wood on to paper and cut paper to fit. Modge Podge the paper to the plywood as you like. I had a gap where my paper was too short, so I patched it with another color. If you need help with Modge Podge (as I did) here is a great tutorial.
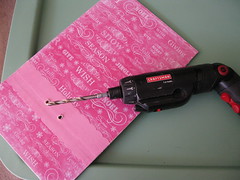
4. When everything is dry, eyeball where you want a bow (optional) and drill two holes. Insert the ribbon in the holes to form a simple bow. If you don't have a drill, come up with some other embellishment. The scrapbook section at craft stores have a wealth of potential doo dads for this kind of thing. I am using what I have today.

5. Hot glue the acrylic frame in place. Hot glue picture hanger thingy in place on the back.

I think these simple frames would make great hostess gifts. I plan to make a stash of them to have on hand this holiday season.

Now head on over to ASPTL for lots more DYI Day projects!

Then head on over to the Shabby Chic Cottage for Transformation Thursday. You will not want to miss her bench!
11 comments:
Stopping by from Kimba's party...looks great!
I have a window that I am turning into a picture frame and I had no clue there were such things as velcro frames! This is such an awesome idea! It looks so good! -Kelsee
Great idea! That turned out very nice.
Thank you for your compliments on my black and white sweater project. And of course thank you very much for you paper frames tutorial. That will come in handy one day, I am sure.
Too cute! I can't wait to make some of these! Thanks for sharing & thanks for stopping by my blog.
Those will make great gifts. Love them!
~ Sarah
Thanks for stopping by! That cam eout really cute!
Manuela
I made several for graduation gifts. They are fun and easy too! Great job.
That is a really cute project ... I like it! I can't believe you didn't get your paint yet - that is a bummer! Hope you're having a good week other than that! ;-)
CUTE project!! :) I love the pink. Thanks for stopping by my blog! :)
What a great gift idea!
Post a Comment