So when I say "tool free" I mean power tool free. I hope that you have a screw driver, a big nail, a hammer and a paint brush.
First up, remove the drawers and doors.
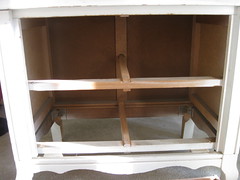
Investigate the inner workings.
The oven
To make a truly tool free oven, Paint the insides of the top drawer to look like the insides of an oven! Paint the outside sides black or something that would also be ovenish. The drawer will open just as it always did, but you can make it look oveny by painting stripes to represent the rack on the bottom. Paint it gray or black. I would also use my screw driver to replace the fancy handle with a more oven looking handle. This idea came from Kelly and I thought it was genius! Kids have tremendous imagination and they will get that it is an oven. Plus, how easy for storage and clean up! I really love this idea. One thing to think about is the sink. If you have a shallow sink or a countertop bowl sink, no worries, but a deeper sink would keep the drawer from opening properly.
You could also follow the steps for shelves from Lesson 1 and have Lowes or HD cut you an oven door. Without tools, it would have to be a solid oven door. If you can break your drawer without tools, you may be able to do the drawer front oven door too.
Now, for tool free, I would not take off the back to put the bottom shelf in because of the way it's assembled with that vertical column piece. But, that's just my cabinet, your cabinet may be different.
If you can not take the back off without disturbing the drawer rigging for an oven drawer, then I would have Lowes or HD cut me two smaller pieces that together made the measurements for the bottom shelf. That way you can slip them in from the front and glue them in place. The bottom cross bar is a good place to glue. Again this varys from cabinet to cabinet.
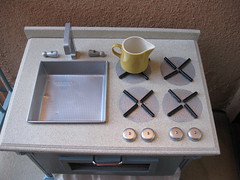
The Sink
For tool free I would use a square baking pan similar to the one in the blue kitchen below. I would glue it right to the counter and voila! A trendy bowl sink! I think this could be super cute with a vintage type kitchen or an ultra modern kitchen.
Backsplash- Have Lowes or HD cut you a board that is the length of your kitchen. Your backsplash can be as high as you want or low like this one. Use your big nail to make premake holes for your screws and screw your backsplash to the back of your kitchen. I am sure you could use some really strong Gorilla Glue or Liquid Nails too if you prefered. Another option, a backsplash doesn't get a lot of wear and tear. I see no reason why this couldn't be made out of two layers of cardboard cut the way you want and glued on.
OK, if you are doing the tool free, drawer oven and bowl sink, you are basically done. All you have is to install the bottom shelf and paint it up cute. You will want to get a curtain rod to make a curtain for the bottom- or not. The cute burners, faucet and extras are coming up in two posts. Meet you there!
As always, ask questions!
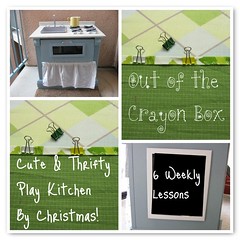
Play Kitchen Build Along Introduction
Lesson 1
Lesson 2 With Tools
My Play Kitchen Inspiration
1 comment:
What an amazing idea! I love your play kitchens!
Post a Comment