I found this pajama top at the Goodwill. I loved the fabric right away and knew it would make a terrific apron. I know, there are already a thousand apron tutorials in the big world wide web. Now there's another.
Really though, pajama tops are perfect. Pajamas come in the best prints. While my pajama bottoms are worn thin, my pajama tops are always neglected in favor of a tank top. They get hardly any use. Many pajama tops have big pockets and the bottom is already hemmed. Also, at our So. Cal Goodwill, pajama tops are just a buck.
Quick and Easy Trash to Treasure Pajama Top Apron
Supplies:
A pajama top- the one I used was a medium and it was plenty big enough.
Thread and any other embelishments you like. I used some pom pom trim I had.
One spool of grosgrain ribbon for the ties. Or if you like, you could also use other fabric for the ties. Since making the ties is my least favorite part of making an apron I opted for ribbon.
Directions:
1. Cut the bottom off the top.
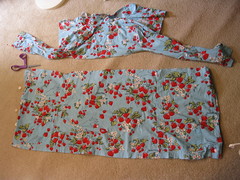
I cut right below the armpits.
2. Add trim to the bottom if you choose. I added some pom-pom trim to the already hemmed bottom.
3. Gather the raw edge top. You can sew a loose basting type stitch and then pull the tread to gather as I did. Or you could pleat it and sew across. I also sewed a tight stitch across my gathers to secure them.
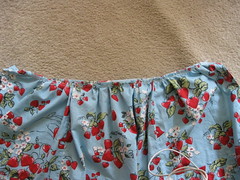
4. Once you have gathered your top edge, measure to see how long the top is. Mine was about 20" long. So I cut a strip about 4" X 20" from one of the sleeves to use as a waistband.
5.Sew the waistband right side facing the wrong side of your gathered edge fabric. I know that is hard to explain, but after you sew the right side of the waistband to the wrong side of the fabric, you should be able to fold it up like this:

6. Iron a bit of a hem to the top edge as shown above. Then fold down the waistband so that it now looks correct and matches the front of the apron like this:
7. Pin the waistband in place. Make sure to cover any of the gathering basted stitches. and top stitch it in place close to the edge.
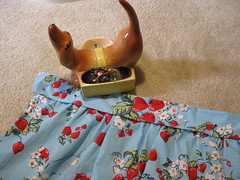
8. Pin the ribbon so that it is centered on the waistband. Then sew it across the waistband. Be sure to sew some extra stitches at either end so it is good and secure.
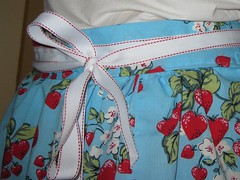
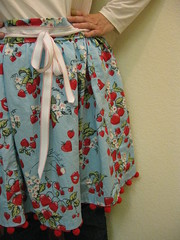
I like my ties to wrap around and tie in front. Ribbon makes this so easy to do.
9. Trim any loose threads.
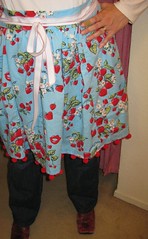
10. Pose for blog pictures.
How easy was that? Really, steps 9 & 10 are fluff. This is a quick project!
Oh and one last thing, you can still vote for my lemonade stand!

I am sharing this at Reinvented for Trash to Treasure Tuesday!

7 comments:
LOVE this! It's one I think I can actually handle.
Thanks!
Very cute!
Too cute! I love it. :)
It was easy! thanks for sharing :]]
I appreciate people who know how to recycle. Anything old can still be transformed to something new and fashionable. Thanks for sharing!
ties
love this idea! i have the same issue with pj tops- the bottoms get super worn out and the tops look almost good as new. i'll definitely be trying this. ps- voted for your lemonade stand- and not just cuz i like ya- i really do think you deserve to win! go girl.
I just spotted the little ceramic container with the dog that you use for pins. I came across this same item at Goodwill last weekend!! I picked it up and showed it to my boyfriend because I said I had to have it, but I just didn't know what it's for or what I would do with it... Now I really wish I would have bought it. Do you think it was originally for sewing? Or a kitchen item?
The apron looks great- very cute : )
Post a Comment