
I am finally on vacation! Let the crafting begin...
This is actually my CSI challenge for last week's Dollar Store Challenge that I missed. Luckily for me, it is "Wall Art" week!
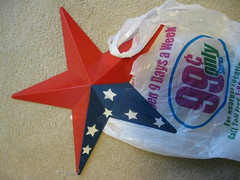
This pretty star started as a cheap dollar store 4th of July star. I covered it with Christmas sheet music.
Yup, I am working on Christmas! Sometime last year I thrifted a book of Christmas music with a project very much like this in mind. Now that I don't really have a "white Christmas" I find myself craving white Christmas decorations. I could see this being a summer decoration with a few shell embellishments and some non Christmas music.
This project came together so easily I may have to go back to 99 Cents Only and get another star.
Here's how I made this Christmas Star wall art:
First off, the goods. Here is the before shot.
I primed the whole thing with gray spray primer. Then I fit the paper to the star by pressing the paper against a star point and creasing it along the edges with my finger.
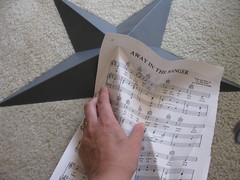
You should be able to see the crease marks really well.
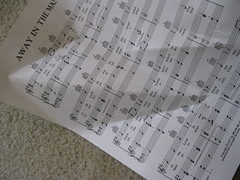
I cut around the crease mark leaving an edge at the bottom of the point. However, I cut exactly on the crease mark at the top of the point- the part that would be in the middle of the star.
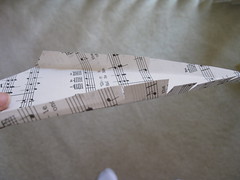
I hope that makes sense. I put some notes about this over on the flickr photo.
Next, I held the paper in place along the point of the star an
d folded the extra under the edge of the star. I then cut little flaps to tuck and glue under the star.
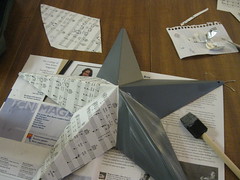
I put Modge Podge on both the paper and the plastic. I fit one point at a time smoothing and adjusting as I went along. The top point has a hole for hanging. I wish I had paid closer attention to that point. As it is, the text is upside down. It's in a small enough scale that I don't think it detracts from the look. It's just I wish I had caught that. Oh well. I also added another coat of Modge Podge on top and dusted the whole thing with some clear glitter.
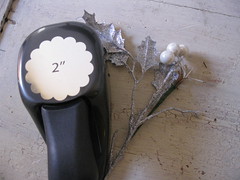
For the embellishment I took my 2" scallop punch and punched out 9 circles from the leftover music scraps. I folded eight of the scallops into quarters and then hot glued them onto the leftover scallop in a flower pattern. I used some leftover silver holly floral picks from last Christmas to finish it off.
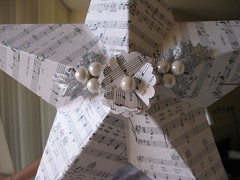
Lastly, some ice blue velvet ribbon to hang.
There you go, not exactly Christmas in July, but close! Be sure to check out the other CSI Wall Art challenge projects.

Updated: I hope this solves the flickr problem. I reloaded them all.
Sorry about that.

15 comments:
Ok you are super talented. I love coming to visit you each week to see what you have created. I am loving this!
It's beautiful!! Loving thinking of Winter in our 105 degree heat today!!!
Oh boo! The Flickr photos are not showing up!
:(
I adore this and would love to see how it is made. I will check back later.
very cute project! wanted to let you know I made a play kitchen (with much help from your tutorial) and linked back to your blog. check it out here: http://www.laforcebewithyou.com
What a great tutorial! I think I need to hit the dollar store again...
This looks very nice.digging the sheet music,the flower and the pearls.
Thanks for visiting and leaving a comment.Glad to know you like to quill.I am a novice at it so have loads to learn.Do make some things so (if you have not done that already,still need to go through your entire blog)that I can copy you.:-)
Oooooooooooooooh - I like this idea!!
So cute! As always, you take the hum drum and spice it up to gorgeous! Hope you are well!
Brilliant!!!
Oh my word... I LOVE THIS!!! I'm thinking I might try to copy it with hymns, rather than Christmas music, then I could hang it year-round above the piano. Beautiful!
Some people are satisfied with fairly simple wall art, while other people find it fun to spend a lot of time making their own unique piece of wall art.
I can't thank you enough for this wonderful tutorial! I LOVE your star and it's embellishments! I hope to copy it exactly (that's about the extent of my abilities - trying to copy a master). If I ever blog about it (can't find enough time lately), I'll for sure link to your fun blog! Following along and eager to learn more now...
EnJoY your Christmas,
Leslie
Thank you for sharing all the lovely designs. I would so love these stuffs, they are just perfect for all the little projects.
Thank you for sharing these creative ideas. I would love to have that.
This is much great work when vacation. I like all of your unique designs. Also, thanks to the tutorial that i learned a lot from it. Great blog!
Post a Comment