Showing posts with label Craftivism. Show all posts

Monday, April 5, 2010

Craft Hope Bean Bags

Craft Hope Bean Bags
Well, I finished my bean bags for Craft Hope's Liberian Orphan Education Project.


My pledge to not buy any craft supplies in April almost came to a quick end on April 1. I signed up to make the beanbags and thought I would use actual beans, but on further inspection, the directions call for plastic pellets or other non-food filler due to customs regulations. Makes perfect sense. And, since this is for a good cause I was going to bend the no buying stuff rule just a bit. Then I priced plastic filler online. It's not cheap, but I am.

Hmmmm... what to do? Ah ha! That squishy pillow I bought on a whim about six years ago when those squishy pillows were all the rage...adios amigo! I never did like that pillow much, but I have held on to it anyway, pack rat that I am.
Bean Bag Filler
I very eagerly cut into the pillow to stuff my bean bags. The squishy pillow is made of about a bajillion trillion teeny tiny Styrofoam bits. It was seriously like the attack of the styrofoam nonpareils! All over my hands, face, sewing machine, everywhere! I put it in a large paper bag and worked from there.

I used a funnel to fill the bean bags and just said a small prayer of gratitude for my excellent vacuum cleaner.
Craft Hope Bean Bag Backs
Although it was messy, these styrofoam nonpareils were awesome to work with. My sewing machine could sew over/around them and closing the bags was pretty easy. They did cling to everything, but they also vacuumed up easily. I had more than enough for 20 number bean bags, a set of shape bean bags and one large pillow for future crafting.
Craft Hope: Shapes Bean Bags
To make the shapes, I first printed out shapes from a basic Word document using "autoshapes."
 Tracing shapes
Then I traced this onto freezer paper and cut them out. I ironed the freezer paper to the fabric and sewed right around the edge. Then I trimmed everything with my pinking shears.
Sewing Around Freezer Paper
It worked like a charm and my shape bean bags are all recognizable!

I used freezer paper stencils and craft paint with a fabric medium added to make the numbers and the dots.  I just labeled the shapes with a Sharpie marker. I am not sure if  English was the best way to go, but the samples from the teacher store all had them labeled.

It felt great to have used up some fabric, re-purposed a pillow and done a little good too. I am so thankful for the ladies at Craft Hope who give us fun and easy ways to help others!

I am linking this to the DIY Day at ASPTL.


DIY Day @ ASPTL

Thursday, April 1, 2010

Craft Hope - Bean Bags

Bean Bags


I'm busting stash for a good cause today. Maybe you'd like to join me? Check out Craft Hope's latest project here.

Sunday, November 8, 2009

Looking Forward to Christmas

A few things...

1. Chris at Just A Girl is having a linky party today with the theme, "I Can Make That!" Boy have I said that a bajillion times. Recently I set my mind to making new Christmas stockings. My search for "the stockings" lead me to about a dozen stockings that I love and want to make. So I am declaring this the Christmas of the Stockings! I actually think I will make some in lieu of gift bags. First up, a white stocking.

Cliff patiently looked through all the stockings saved to my favorites folder on flickr. He liked these the best. So, when I learned how to do Citra Solv transfers I thought, "I can make something like that!" I would attempt a simple white stocking. I transferred a photocopied "Noel" to some thin white muslin type fabric. I placed it face down onto the muslin and rubbed the image with a cotton ball dipped in CitraSolv. I burnished with the edge of my spoon and voila- "loeN!" Funny thing was I forgot to use the mirror image function when I printed, so the writing came out backwards! No worries- the fabric was thin and the transfer was dark, so I just flipped the fabric over and the back became the front. The lettering was corrected and no curses were spoken.
CitraSolv & Photo Copy Transfer on Stocking

 This stocking is really simple. Too simple. I want to add some pom-pom trim or bling or something!

White Stocking

Ahh! Much better! A dollar store ornament and some great wallpaper. Don't I wish I had that wallpaper!


Build A Better Background

 Just fooling around! That's a pillowcase taped to the wall. We had plans to go to a play, but when they got postponed, I decided to play around the apartment.

Anyway, the stocking is a gift for a friend.. I have a few small gifties to put inside and in the meantime, it can decorate my place until we meet up to exchange gifts.
Kitchen Lesson Logo

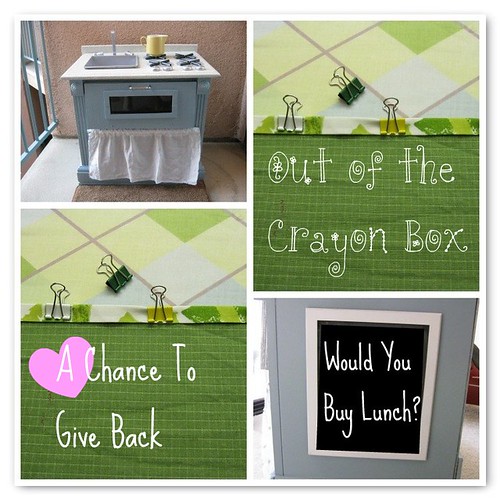
2. A few years ago I said, "I can make that" about a PB play kitchen. Now I am saying, "You can make it and I'll show you how!" The Play Kitchen Build Along has just started and there is still time to join in if you would like to build a play kitchen (on a budget) in time for Christmas!

3. The new Sweet Goodness Swap is posted and sign ups start today, Monday November 9. The theme is Sparkling White Winter. These swaps are always lots of fun, so I plan to sign up. You may want to check it out too!

4. Speaking of stockings and winter, I recently posted about my interest in the cause of homelessness. Theresa Tese founder of Comfort Socks wrote to me and shared her inspirational story of how she came to be involved in working with the homeless. I am very moved by Theresa's story because she was just one person who had an idea and made it happen. I think we are all capable of great things in God's name and this is just another example! If you are looking for an easy charity project for your school or scout organization this one is terrific. Theresa has Boy Scouts and sports teams collecting socks for all sorts of projects.

5. Did you see the great giveaways at the DIY Showoff? Click on this button and head on over!
The DIY Show Off


Now head on over to the linky party at Just A Girl.


Have a great week!

Thursday, November 5, 2009

Somebody's Baby

I moved out to Los Angeles to marry my best friend. There is no other reason I would have considered life on the "Left Coast." Many, many things have been shocking to me, but the one thing that really upset me in my first visits and first year here was the problem of homelessness. I'll be honest, one homeless man near my  apartment looks exactly like my childhood image of the Boogy Man. Although we never interacted he frightened me.

One day at lunch we were discussing the problem of homelessness in the city. I asked one my colleagues if her children were afraid of the homeless and how she talked to them about the problem.

She said, "I tell my kids that the homeless men and women we see were once somebody's baby."

 There by the grace of God go I.

It was a comment I needed to hear. One that changed my life. It softened me to see the person within the rough crust of street life.

One of the reasons we joined our church is that they have a tremendous acceptance of all people. Homeless people come to our church and participate fully in worship each week and we serve a small lunch each Sunday that is free for anyone. On Tuesdays we serve bag lunch to over 100 homeless persons each week. In addition to lunch, clothes (especially socks) and toiletries are made available. I think it's a powerful demonstration of God's love and it is an important ministry to my development as a Christian as well.

I love the creative challenge of making the play kitchens and it's been a great way for me to contribute to the homeless ministry. I like the fact that on both ends "somebody's baby" benefits.

I started the Play Kitchen Build Along to share my techniques. Free and easy-like so many of the wonderful craft tutorials on the internet. It's an amazing community this internet!

Along the way on this creative journey, I have made some great bloggy friends. And, one friend who has given me so much play kitchen love, shared the idea of setting up a way to donate to the homeless lunch program. I am so amazed by the heart of this creative community! Craft-ivism is one of the big reasons I love blogging! So many opportunities to use your creative passions for the greater good.
If you are enjoying the Play Kitchen Build Along and would like to contribute to the Homeless Lunch Program you can donate on paypal! You can read about the lunch program here. You can donate to the lunch program here. Be sure to put "Homeless Lunch Program" in the purpose box so your donation gets directed properly.

Thank you for considering this cause!

Play Kitchen Build Along Introduction
Lesson 1 Supplies
Lesson 2- Demo & Construction
Lesson 3- Assembly & Body Paint

I am linking this post to the DIY Showoff  Show & Tell party! If this is your first time visiting- Welcome!
The DIY Show Off

Monday, October 5, 2009

DIY Play Kitchen #4- The Green Kitchen

From this:Donated Nightstand

A generous woman named Rachel had this nightstand for sale on craigslist.  It was listed for $10 and I asked her if she would donate it to my play-kitchens-for-homeless-lunch-money cause. She agreed. Isn't craigslist the best?

I turned it into this:
Vintage Looking Play Kitchen

Thanks to everyone who encouraged me to paint it green. I think it's my favorite yet. Certainly it's my favorite color combination.

My plan is to list it on craigslist for $100 on Thursday. I have a few touch ups to make and I find Thursday is the best day to list things as people prepare for weekend pick ups, garage sales, etc... As usual 100% of the money will go to the homeless lunch program at Hollywood UMC.

Construction was very much like the others. The inards formed two shelves and I just replaced the cardboard with plywood for the shelves. I used the drawer front and scraps from the drawer to make the oven door.
Nightstand Innards

For some trash to treasure goodness the  magnetic chalkboard is made from an old baking sheet (also free from a craigslist curb alert) and the knobs are spray painted soda bottle caps. The cherries were cut from a paper napkin and Modge Podged right on there. With every kitchen I get more creative and economical. I don't think the cuteness has suffered though.
Stove Top
The oven is a bit small, excellent for pizzas and pies I say!
For many more details on how to build a play kitchen see my notes in the Play Kitchens flickr collection.
 (Updated to add: This link has been fixed!)
Cost Break Down

24"X 24" plywood sheet for shelves and back spash- $4.95
dowel for curtain rod and sink knobs- about $2
square dowel for burners about $1
hinges- $1
door handle - 4/ $1 so $0.25
bowl - $2
letter J for faucet -$1
wooden picture frame -$1

From my stash:
paint -Glidden's "Sea Spray"
chalkboard paint
primer
woodglue
screws
fabric
white and silver spray paint
black craft paint
cherry paper napkin


DIY Day @ ASPTL

Check out all the terrific DYI/ Trash to Treasure ideas at Reinvented & ASPTL!

Thursday, September 24, 2009

Another Kitchen: Retro Green or Pretty in Pink?


Have you heard about this blog party? It's all about sharing our creations from the free Glidden paint giveaway. (Or any free paint you have lying around. Wendy's inclusive like that.)

I am fix'n to be ready!

I thought about linking up to the chairs that I painted. But, through the awesomeness of craigslist, I have another nightstand to transform!

Since I had five people inquire about the last play kitchen, I really wanted to do another quickly. With Christmas around the corner this is prime time to sell these. Not to mention, this Christmas might be pretty lean for people and the opportunity to give something to a child and a tax deductable charity is a pretty good twofer deal. My goal is to make two more play kitchens in time for Christmas giving.

I decided to get a little wiser in my search for curbside cabinets and troll craigslist. The free section had the perfect thing with the blue kitchen, but since then I haven't been so lucky. This is LA after all and getting across "town" in time for a "curb alert." can be problimatic. We aren't known for efficient transportation. So, I started looking in the "for sale" section. I set the price low -$1-$10. Then I wrote to a seller and asked if she would consider donating her cabinet. She agreed!

Thanks Rachel! (Every Rachel I have ever met has been really awesome!)

Now of course I am debating: Should I use my free Glidden in the seafoam green or to go all out girly and paint it with the leftover pink paint from Bella's kitchen? Care to weigh in?

Thursday, September 10, 2009

A Nice Craigslist Story

Simple Blue Kitchen
The blue play kitchen finally sold!

When I first listed the blue kitchen on craigslist there was one lady who was interested right away. She wanted me to meet her in Glendale, about a half hour away, to deliver it. Usually I have people pick the kitchens up at church. That way they can pay the church directly and there is no question of impropriety. There are so many scams on craigslist and I just want every thing to be on the up and up. But, I also wanted to sell the kitchen quickly and this is a recession. So I agreed to deliver it.

All I asked was that she pay me with check or money order made out to the church. She responded by asking me to lower my price by $40. I thought about it for a couple of hours and decided that I wouldn't do that. It takes me some time to make them and I really want to make a good amount of money for the homeless program.

She decided that she didn't want to buy the kitchen, but asked what I would charge to make one out of a cabinet she already had in her garage. I told her the same price. $100. I get my cabinets for free as they come off the curb. Again, I think my time and my cause are worth the money. She wasn't interested. It was a discouraging exchange of emails.

So for a month it sat in our apartment and languished on craigslist without a single bite. I prayed about it and just decided to hold tight. I wasn't being greedy for myself after all.

The week before school started in my mad dash to tie up loose ends, I took the play kitchen over to church and listed it again on craigslist. Within a few days I had five people interested and it sold shortly after.

Then I got this email:

"I have been wanting to make my little girl a kitchen like the one you made. I am in San Diego so most likely would not be able to buy one from you even if you made another one. But yours was sooooooo cute that I thought I would ask if it was still available. Can I ask you where you bought the sink faucet and little levers? I have had my eyes out for a little cabinet for soooooo long!
;)kelley "

I replyed with a link to my flickr set which details all my "trade secrets" in kitchen making.

I got this email in reply:

Hi Jane,
I just have to say,
1.) You are my craft hero.
2.) Thank you so stinkin much for sending me your flickr site link. I am so inspired.
3.) Your kitchens all turned out soooooo amazing.
4.) Love your monkeys too!
5.) I am DETERMINED to make my little girl a kitchen now and will definitely send you a picture once I am finished.
6.) The best thing about seeing your creative kitchens was knowing that you do this out of the kindness of your heart to help the homeless.
7.) If I lived in LA, we'd be fast friends. (Actually, I went to CSUN for college so at one time I did live in LA.)
8.) I promise I'm not some weird stalker.
Thanks again and take care.
;)kelley

I can not tell you how that made my day! First off, she said "stinkin" which I say all the time. So much so that Cliff is constantly asking, "How freak'n stinkin cute is that!" Second, it was such a nice boost after the somewhat unpleasant exchange with the other lady.

(The truth is I don't just do it for the homeless program. Mostly I do it because I like to make stuff and sell them for the homeless program because it gets them out of my apartment. I am not much of a salesperson and hate asking people for money. If I sold them for myself I would have taken the $40 discount I am sure. The cause gives me more confidence.)

Thank you Kelley! You made my day and I can't wait to see your play kitchen!

Wednesday, July 22, 2009

A Kitchen Business Perhaps

Hollywood UMC from Highland
Hello!

We have had company for the last few days which has meant I needed to keep the apartment clean. This has put a halt to all creative endeavors for a bit. Tons of ideas in my head though, so stay tuned.

This week I listed the Simple Blue Kitchen on the Los Angeles Craigslist. While I have yet to sell it, I did receive this email which I thought could be really interesting.

"I just have to tell you you are doing a great job with the play kitchens. The black one you sold was awesome I wanted to buy it but I was not able to take the time to go pick it up. I liked it a lot. I am a preschool teacher and a mother of a little girl. How fun to have one. I have a cabinet that I think would work out to be similar to your last one. What would be the price? What a great ministry. Thanks!"

I guess it sort of is becoming a ministry. I am a big believer in abundance thinking. I believe that when we pray to God and row for the shore, our needs will be provided. So far, I have found all three cabinets for free. Now it seems that that good Lord is actually sending the cabinets and the customers to me!

Speaking of ministry, if you live in Los Angeles and are looking for a church home, please feel welcome at Hollywood UMC. If you are ineterested in visiting, email me. I would love to meet you!

Wednesday, July 15, 2009

DYI: Simple Blue Kitchen


From this:
Small chest
To this:
Simple Blue Kitchen

This is my third "free curbside cabinet" to play kitchen makeover. Once again, I used Stone spray paint for a granite looking counter top. This time the color was "Bleached Stone." I was waiting for my free paint sample from Glidden, but alas, it hasn't arrived yet. I saw this pretty Glidden "Sea Spray" on the mis-tint shelf at Home Depot and took it home for a dollar. I have tons left and plans for it.

This time I decided to stretch myself by making a window in the oven door. I even bought two power saws! (Scary! Loud! Not as fun as a drill!) That's an old acrylic poster frame for the glass.
Oven Window

I also turned a rusty old baking sheet (free at the curb with this cabinet) into a magnetic chalkboard! Would you believe I used regular Pampered Chef kitchen scissors to cut the metal?!
Magnetic Chalkboard
I wrote up detailed directions for this kitchen here. You can see the others here. This kitchen will be sold on craigslist to raise money for the homeless lunch program at my church.

I hope this inspires you to think about that stuff on the curb in new ways! For more DIY inspiration head over to ASPTL and Transformation Thursday at the Shabby Chic Cottage!

Monday, May 11, 2009

Bed Time Baby Tutorial Up

Bed TIme Babies

I made some adjustments to my pattern and created a tutorial on flickr.
Hope you enjoy!

Sunday, May 10, 2009

Bed Time Boys

This weekend I discovered a new site called Craft Hope. I love to blend my passion for crafting with charity giving. It's one way I can stay in our budget and still give to others. Of course when I read about their plan to take dollies to the Casa Bernabe Orphanage in Nicaragua I was right on board!
Simple applique

I went to the flickr group and saw that most people were making girl dolls. So I decided to make some boy dolls. I have a few boy doll patterns in a vintage doll making book I got many years ago at the thrift, but they all required yarn hair. The hardest part about making a boy doll, in my opinion, is the hair. I don't have any yarn and wanted to use my stash and not add to it.

For better or for worse, this summer is going to be all about using what I already have.

I decided to do baby dolls for the sole reason that they can be bald!

A quick google search and I had my "inspiration doll." Before long I drafted my very first pattern! I used the sleeve design from my raggady anne dolls. It wasn't to hard to draw a big "U" for the bunting, but getting the proportions right was a bit trickier.
Sewn in sleevesWorking with the pattern


I have a thing for bald fades! I think that swirl on the back of a bald fade boy's head is absolutely precious. Sponge painting with simple craft paint worked great for the hair.
Sponge Paint a Bald Fade
To make the eyes show up on the dark fabric, I first made circles with fray check. Once it dried, I went over the circles with a sharpie. I also used sharpie for the mouth and cheeks.
Frey Check for eyes

Tah Dah! Bed Time Boys! I am going to tweek the pattern a bit more tomorrow and then I will make a tutorial.
Bed Time Boys

What do you think... long and lean or short and chubby? I am thinking of making a rounder head with the long body.
Bed Time Baby Boys

* The hats were created using a mini version of Soule Mama's Caps for Cap- Haitien.