Friday, January 7, 2011

Another Monkey


From the first "we're pregnant" I was chomping at the bit to make this gift for my brother's daughter Sweet Pea. If you have read this blog for any length of time, you have read about my beloved Lady Monkey. According to the standards outlined in The Velvetine Rabbit, Lady Monkey was is "real."

Obviously, there is no other first gift to be had! 

When I spotted this outfit at Target, it was all decided. A matched set was in order.


I used my favorite Molly Monkey pattern with several modifications. First off, I reduced the size to 75%. I also freezer paper stenciled the face to better match the bib.
 I hate the way my hand stitching looks so I made some sleeves to cover that up on the arms. I used my new ruffle foot to make the ruffle. It was a challenge, but I am satisfied with how it turned out.

Maybe I went a little too big on the ears? (The better to hear you with my dear!) I only wish I had put some plastic bag inside to make them crinkle. Oh well.  The flower is to match the bib and to cover up how lopsided I sewed her head. I used some pink polyester fabric-the kind that might line a skirt. I cut it into four circles for the petals and then seared the edges with a flame. Instead of a button for the center, I used a bit of white fleece. The original Lady Monkey still has real button eyes that have been safely in place for.... a long time, but I didn't want to take any chances. (We were living dangerously in the 70's, huh? LOL)
I also made the tail long and skinny like my Lady Monkey. (The better to swing you with my dear.) The last intentional modification is the sewn on shoes.  How about that wide legged stance? Not sure what I was thinking while sewing. It does help her sit nicely though.

Let's just say she's a dancer.  Of course, there is no way to predict which toy will become the most favorite of all, but I think this one might just have a fighting chance.

Did you have a toy that was "real"?

Wednesday, January 5, 2011

Beachy Yellow Bathroom Reveal

Well, it's bold and cheery.
Featured is one of my California orange crate labels and several family beach/lake photos. This one is my favorite.
Grandma Mary and Olive

That is my Grandma Mary and her sister in Florida. You can just see the rainbow behind them. Right next to it, I have a nearly identical picture of my mom and her sister at the same beach.
Here is the before. (This is actually the other bathroom, but they were exactly the same.) White, sterile, cold.
Hanging my cabana striped shower curtain to conceal the shower door helps a lot.

I used Dutch Boy Refresh in Banana Split.

A Curious Thing About Purdy Paintbrushes

It turns out, I am a bit like Curious George...

Like a monkey I balanced with one foot on the tub edge and the other wedged in the soap dish.  I used my right hand to grip the shower door behind me.  And painted with my left hand! Cutting in with no tape even! I was nearly done when I realized my ambidextrous ways. I was so pleased with myself that I called the Man With The Yellow Bathroom to take a picture.

Dang! Those Purdy paint brushes are good!

The color is Banana Split by Dutch Boy Refresh which just made me feel all the more monkey.

Hope you are having some fun today!

Tuesday, January 4, 2011

White Shanty Frames from the Junk Drawer

 Visit thecsiproject.com
This week the theme for the CSI Project is "White."

Here are my two contributions.

I am sure many of you read Shanty 2 Chic and have seen their wooden frames. This was my take on their idea. I gathered up a whole bunch of junk and got creating.

Rather than use clothespins or clips to hold the picture; I  added metal plates to make them magnetic. The metal plates came from the roofing section of HD and were about $0.60 each. I used Gorilla Glue to secure everything and sprayed it all with spray paint from my stash.
First up, the most traditionally "Shanty 2 Chic" style. I used a little round "bun foot" thing I had for the base and it worked great.  I love the flower magnet and the covered button magnet. Covered buttons are on my list of favorite sewing things. So much fun. This frame was for my sister-in-law, so I made it extra girly to hold a picture of my soon to be niece.

Next up, one for my mother-in-law. For this one I used an old drawer handle. It was rescued from one of the play kitchen drawers. A bit of sanding revealed the brass underneath in a lovely chippy way. The handle makes this really front heavy, so it will have to hang on the wall or stand in an easel. I used an old heart locket for the magnet.

As soon as it warms up enough to spray paint I plan on making one for myself. Can you believe that it is too cold in LA to spray paint?

What junk do you have in that junk drawer that could be put to better use?

Matrioshka Doll Tutorial


Materials:
Pattern 
Page 2
Bottom weight fabric for the body. I used twill, but corduroy or denim would also work well.
Assorted other fabrics for the face, hair, flower, and scarf. I tried to use a variety of textures that a baby would enjoy touching.
A pill bottle for the noise maker inside.
Assorted dodads to make noise. I used wooden beads and metal screws.
Gorilla tape to seal the bottle closed.
A plastic lid to make the bottom flat.
Thread & embroidery thread.
Needle, pins, etc...


1. Cut out all of the pieces. 
2. Use a pencil or washable marker to lightly draw the face. Embroider the face with a simple back stitch.
3. Sew each layer on. It may be helpful to use a light fusible web. I didn't have any, so I just sewed each layer as smoothly as I could. Use a satin or zigzag stitch if you are worried about fraying edges.

4. If you would like ribbon "taggies" pin them in place now.

5. With right sides facing sew around the top and sides. Leave the bottom open.
6. Pin bottom piece in place and carefully sew around it leaving an opening for turning. *Be sure to start machine stitching on the side and stitch across the front so that your neat machine stitching is in the front and the hand stitching is in the back.
 This is probably the most challenging step.
7. Turn the doll right side out and finger press the seams.


8. Stuff doll with polyfill. Fill an old pill bottle with noise making stuff and seal it well with Gorilla tape. Burrow a hole in the stuffing with your finger and insert the pill bottle. Add more stuffing.
 9. Cut a circle from a cheap plastic container to make the bottom stand. I made my circle just a little smaller than the pattern circle. Using plastic lids etc... makes this doll machine washable. Insert this into the hole. Stitch the hole closed. Viola! You are done!

 These ladies are made using the pattern at 100%. How cute would it be to print the pattern in three sizes and make a graduated row of these!

This is only my second time drafting a pattern, so I welcome questions or comments!


Today I am linking up to Tutorial Tuesday and I am going to throw my hat into the ring for the Crafting with the Stars competition.

Monday, January 3, 2011

For Baby Petal

This is the set for Baby Petal's nursery:

I think I did a pretty good job matching the pattern with scraps from my stash.
Pink Matryoshka
I don't think Petal's mama reads my blog, but if you do... Cheers!
Matryoshka Rattle tutorial coming tomorrow!

Sunday, January 2, 2011

Craigslist Bench- A Creative Process

With great parking in this neighborhood we decided that we could go big for our annual post holiday party. Our only limitation is seating.

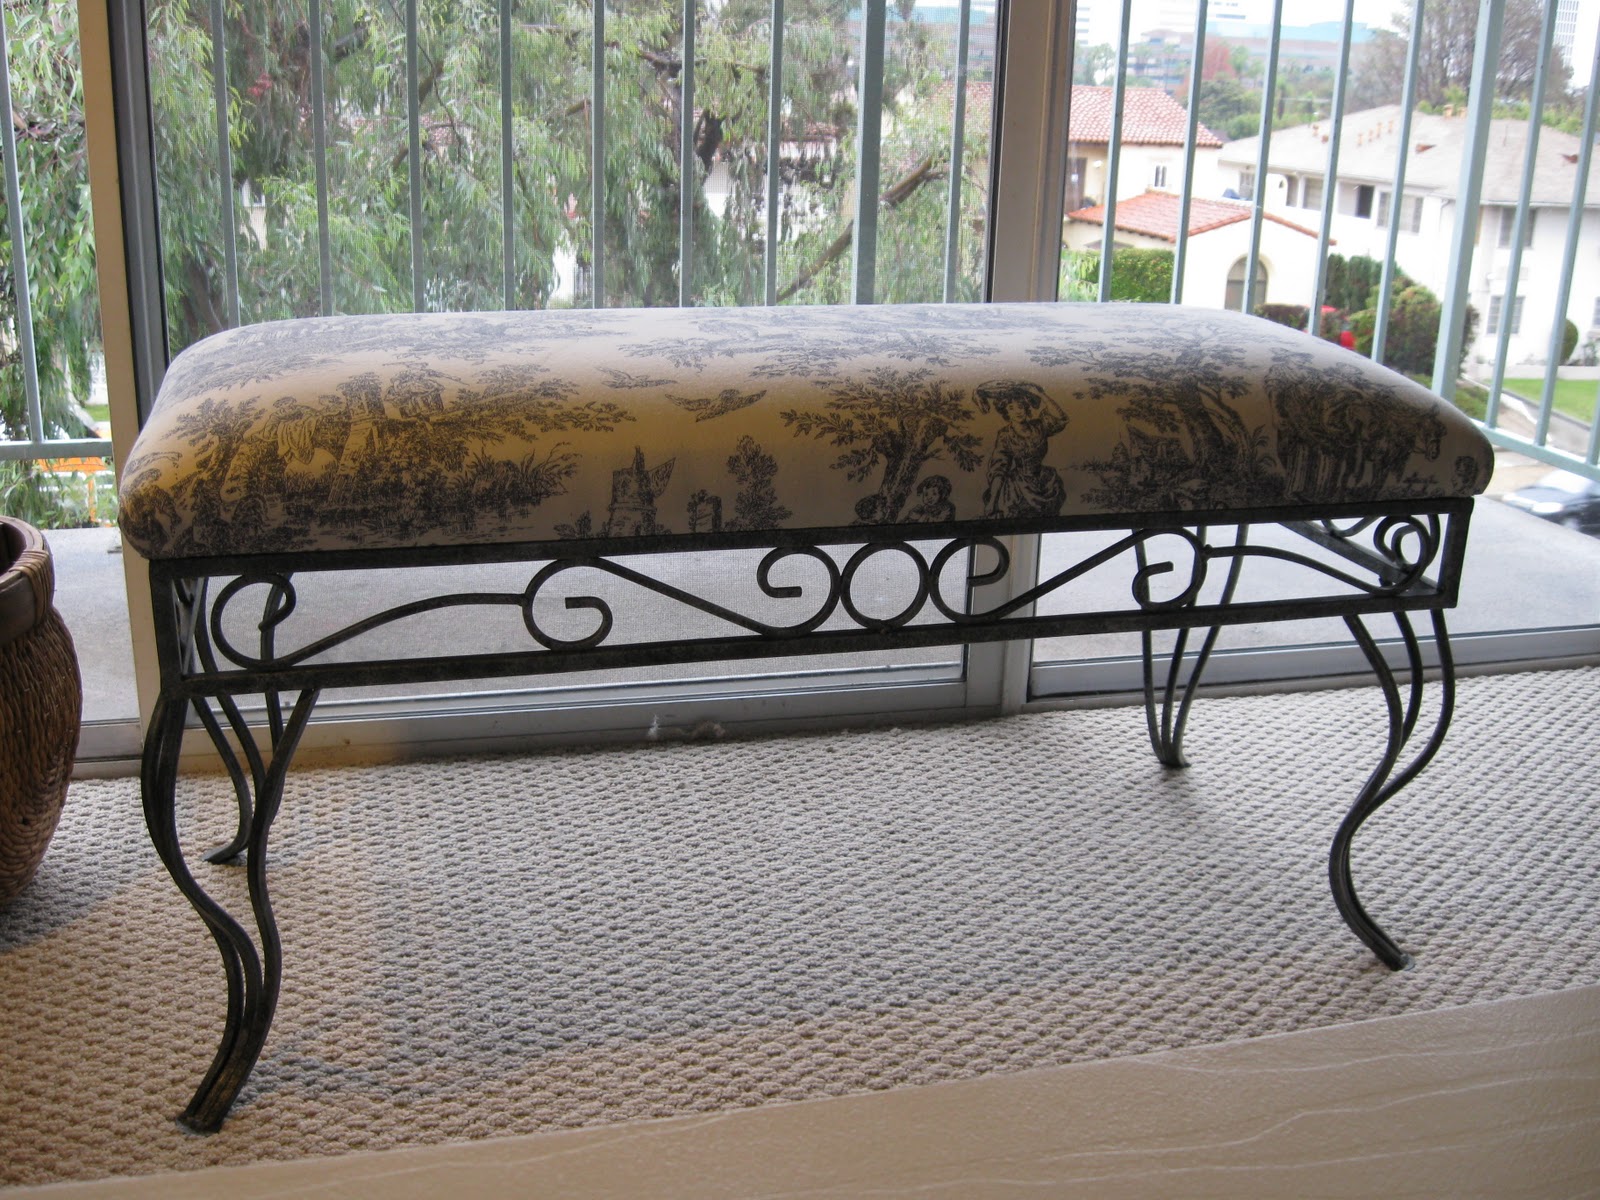
One solution was to buy this bench on craigslist. For $20 we have some extra seating for inside that we can store outside when not in use. It's in perfect condition and buying it couldn't have been easier.

For starters, I searched for it using "Craigs Easy."  Using this program makes trolling craigslist one of my favorite pastimes! When we went to get the bench, both Cliff and I bent at our knees and prepared to share the load. The seller chuckled. The whole thing weighs maybe 20 pounds total. Bonus!

Now for the fun part- the fabric!  My first thought was to switch up the fabric to something of the indoor/outdoor variety. The legs look black because of the lighting, but in real life they are a very blue pewter color.

With a quick online search I found a few I liked. I adored this Suzanne outdoor fabric from HancockFabrics. It has all the right colors for our living room and is bold and modern. However, we plan to store the bench next to our front door and this might be too busy for out there. Also, maybe it was too busy with the scroll work on the bench.


At Joannes I found a couple of prints that worked better with the bench, but was still hesitant. I took that as a sign I should hold out.

I am learning to listen and obey my hesitant feelings. That little whisper that says, "not yet."

I am so glad I did! Christmas day, after a debacle at the airport, we came home to wait for our re-booked flight. I had to tackle a project to beat the homesick blues. Digging through my fabric pile I found the red fabric from my kitchen curtain project.

Still thinking of this Suzanne fabric, I placed it on the bench to see how a bold print looks with the scroll work. (Terrible.) That's when I got the idea to create a slip cover to hide the scroll work.

I made a simple slipcover with that very curtain fabric I already had in my stash.  Right now we like it enough that it may just stay inside permanently. If we change our minds though, I can get all weather fabric (or maybe a vinyl tablecloth) that matches our exterior better for the bench and just use the slipcover for inside.

To make the slip cover, I lined a big rectangle of fabric with some scrap from an old shower curtain. I topstitched all the way around the rectangle. Next I lay the rectangle over the bench wrong side up. Then I pinned the corners into triangles to create tight corners. I sewed the triangle flaps and turned the whole thing right side out. Done!

From pretty, but too delicate to bright and bold in a few easy steps!
We are back from our holiday travels now. It's so good to go away, and even better to come home!
How was your holiday?

 The DIY Show Off

I've linked up!. Lots of inspiration over at the DIY Showoff!